Development Interfaces
The QDE provides multiple development environments to suit different workflows and preferences. Choose between VS Code for comprehensive development, Jupyter Lab for interactive exploration, or direct terminal access for advanced command-line operations.
Choosing the Right Interface
Select your development interface based on your workflow requirements:
VS Code Web is ideal for comprehensive development projects requiring full IDE features, debugging, and complex file management. Choose this for implementing quantum algorithms, writing documentation, and managing large codebases.
VS Code App provides the same capabilities as VS Code Web while maintaining your local development setup and preferences. Use this when you prefer desktop applications or need local system integration.
Jupyter Lab excels at exploratory development, data analysis, and interactive quantum algorithm research. Choose this for prototyping, visualization, and collaborative research workflows.
Terminal serves advanced users needing direct system access for automation, custom tool installation, or command-line Git operations.
VS Code Web
VS Code Web Interface
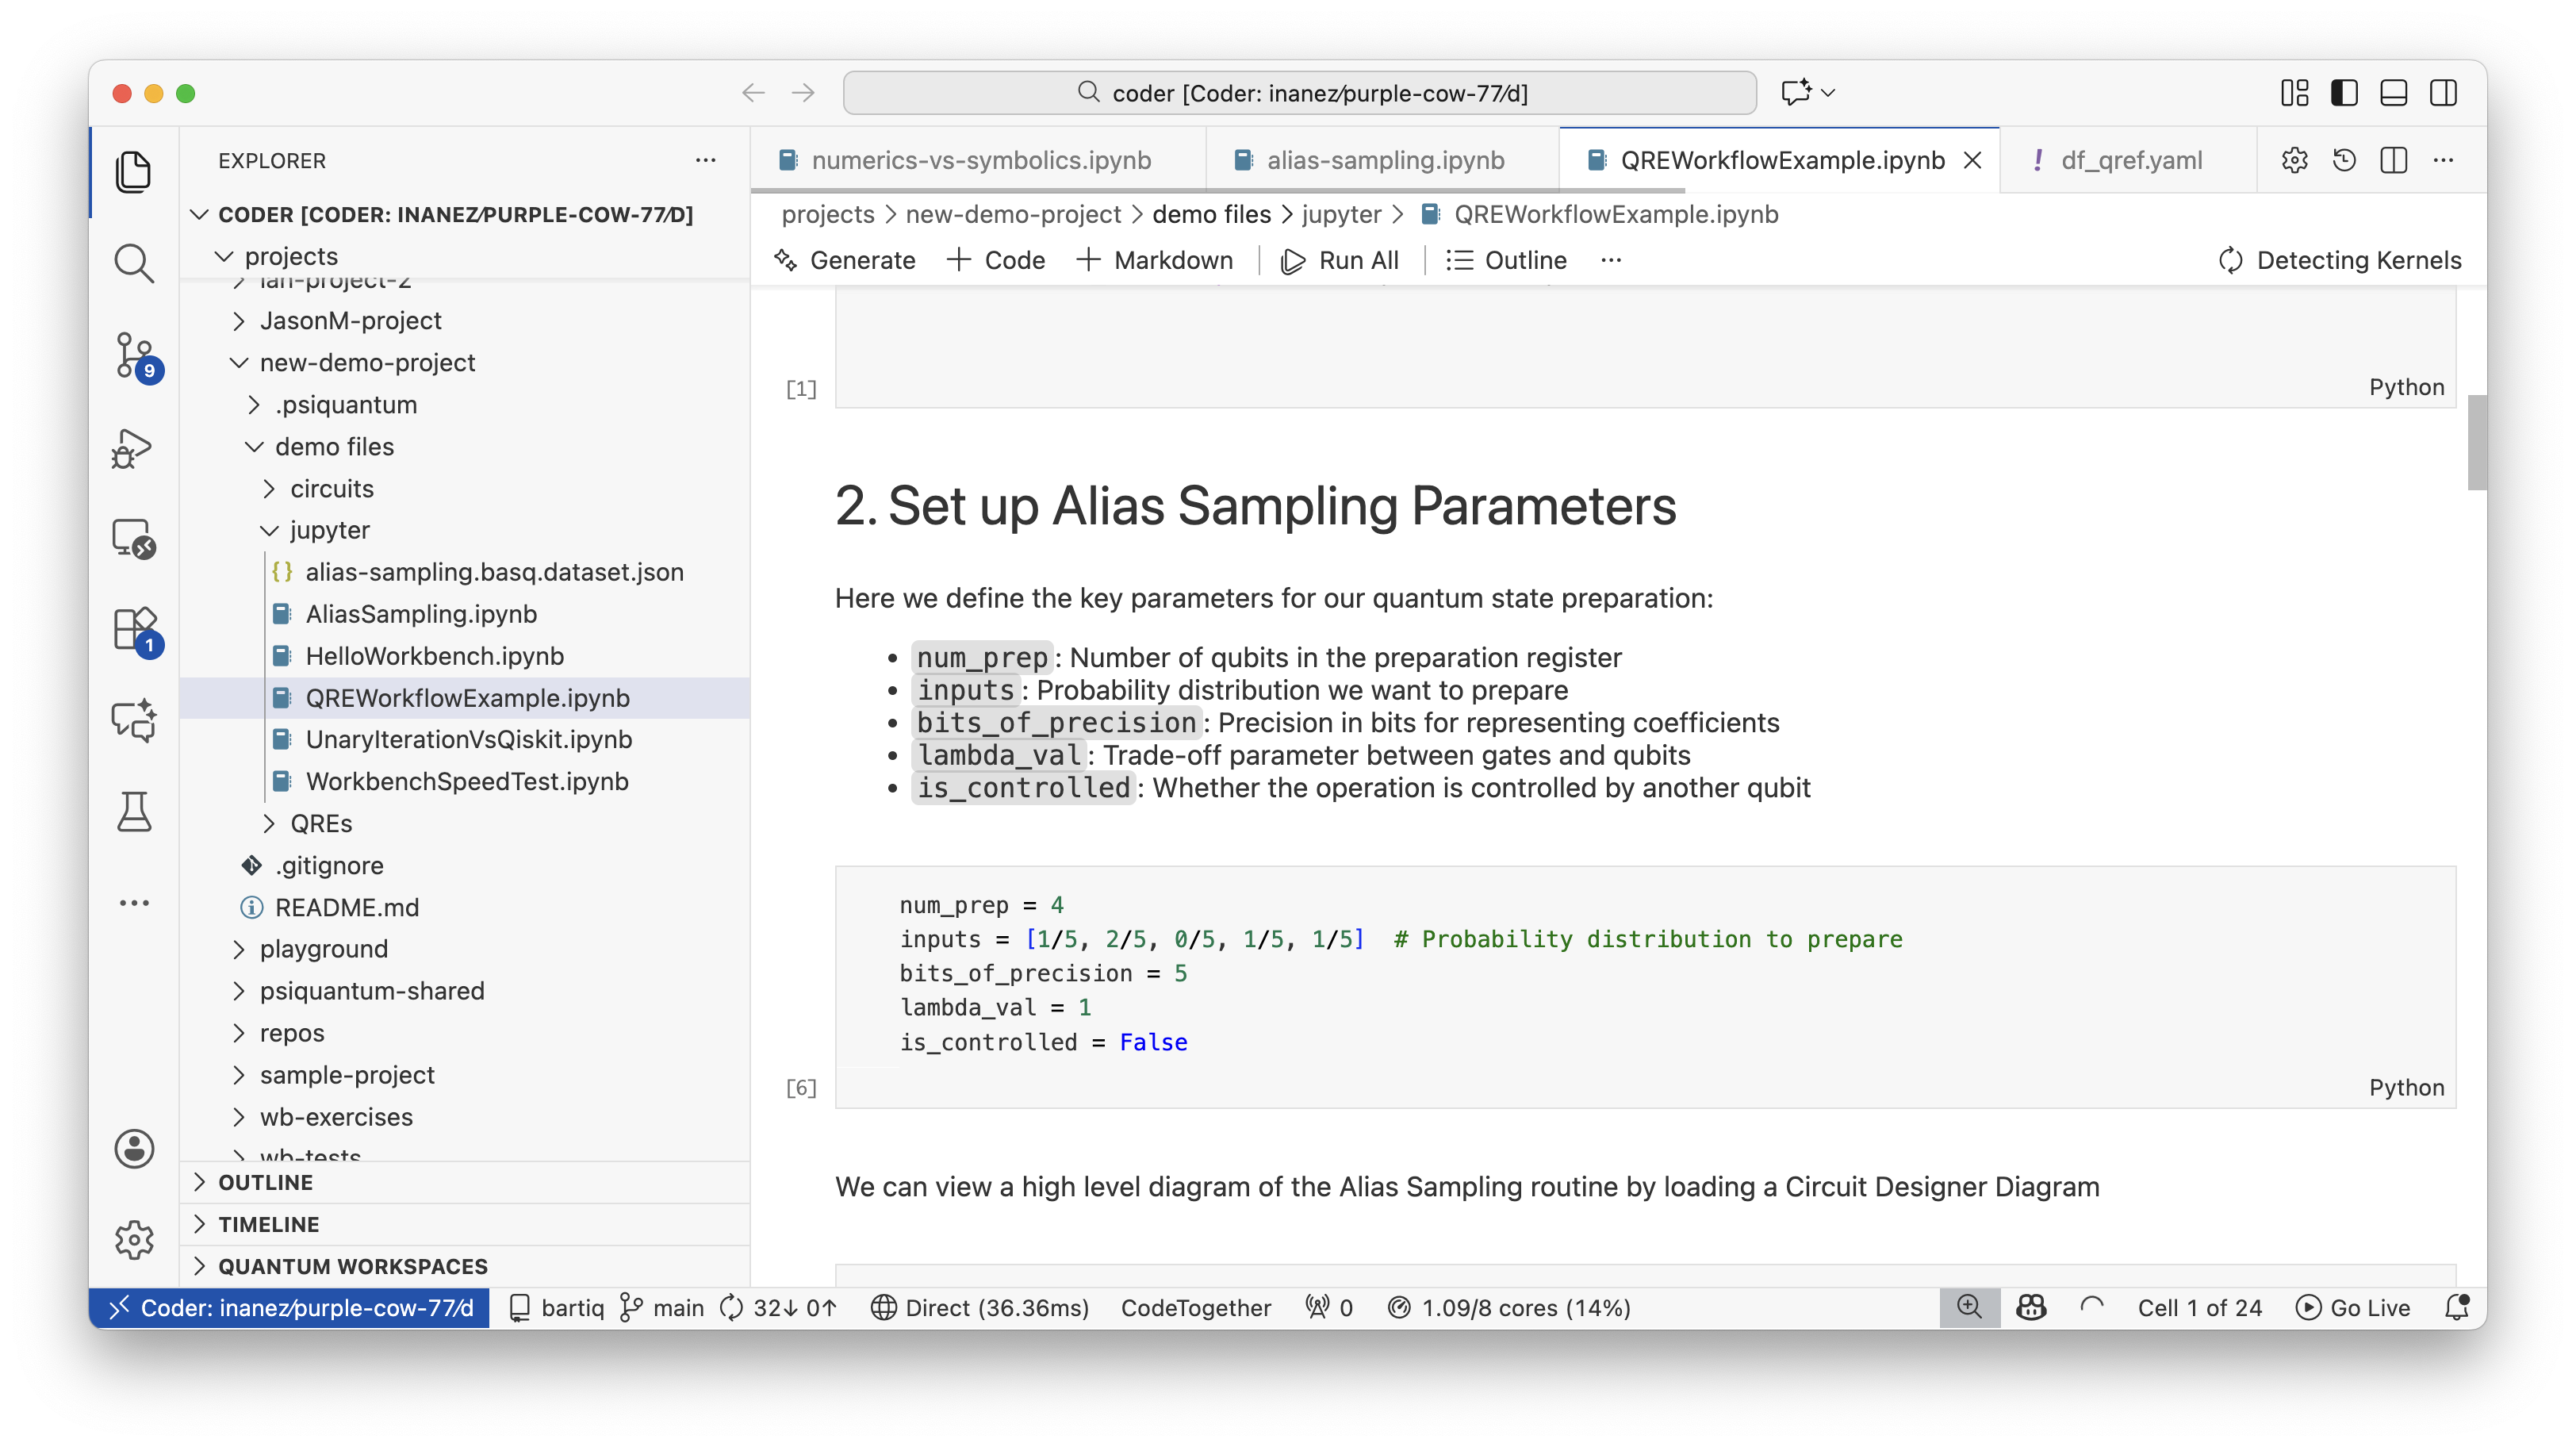
VS Code Web provides a complete development environment with all the familiar VS Code features accessible through your browser. In the QDE it also includes Construct-specific extensions pre-installed and configured for immediate use. The interface provides syntax highlighting for quantum programming languages, integrated Git support, and seamless access to your project files.
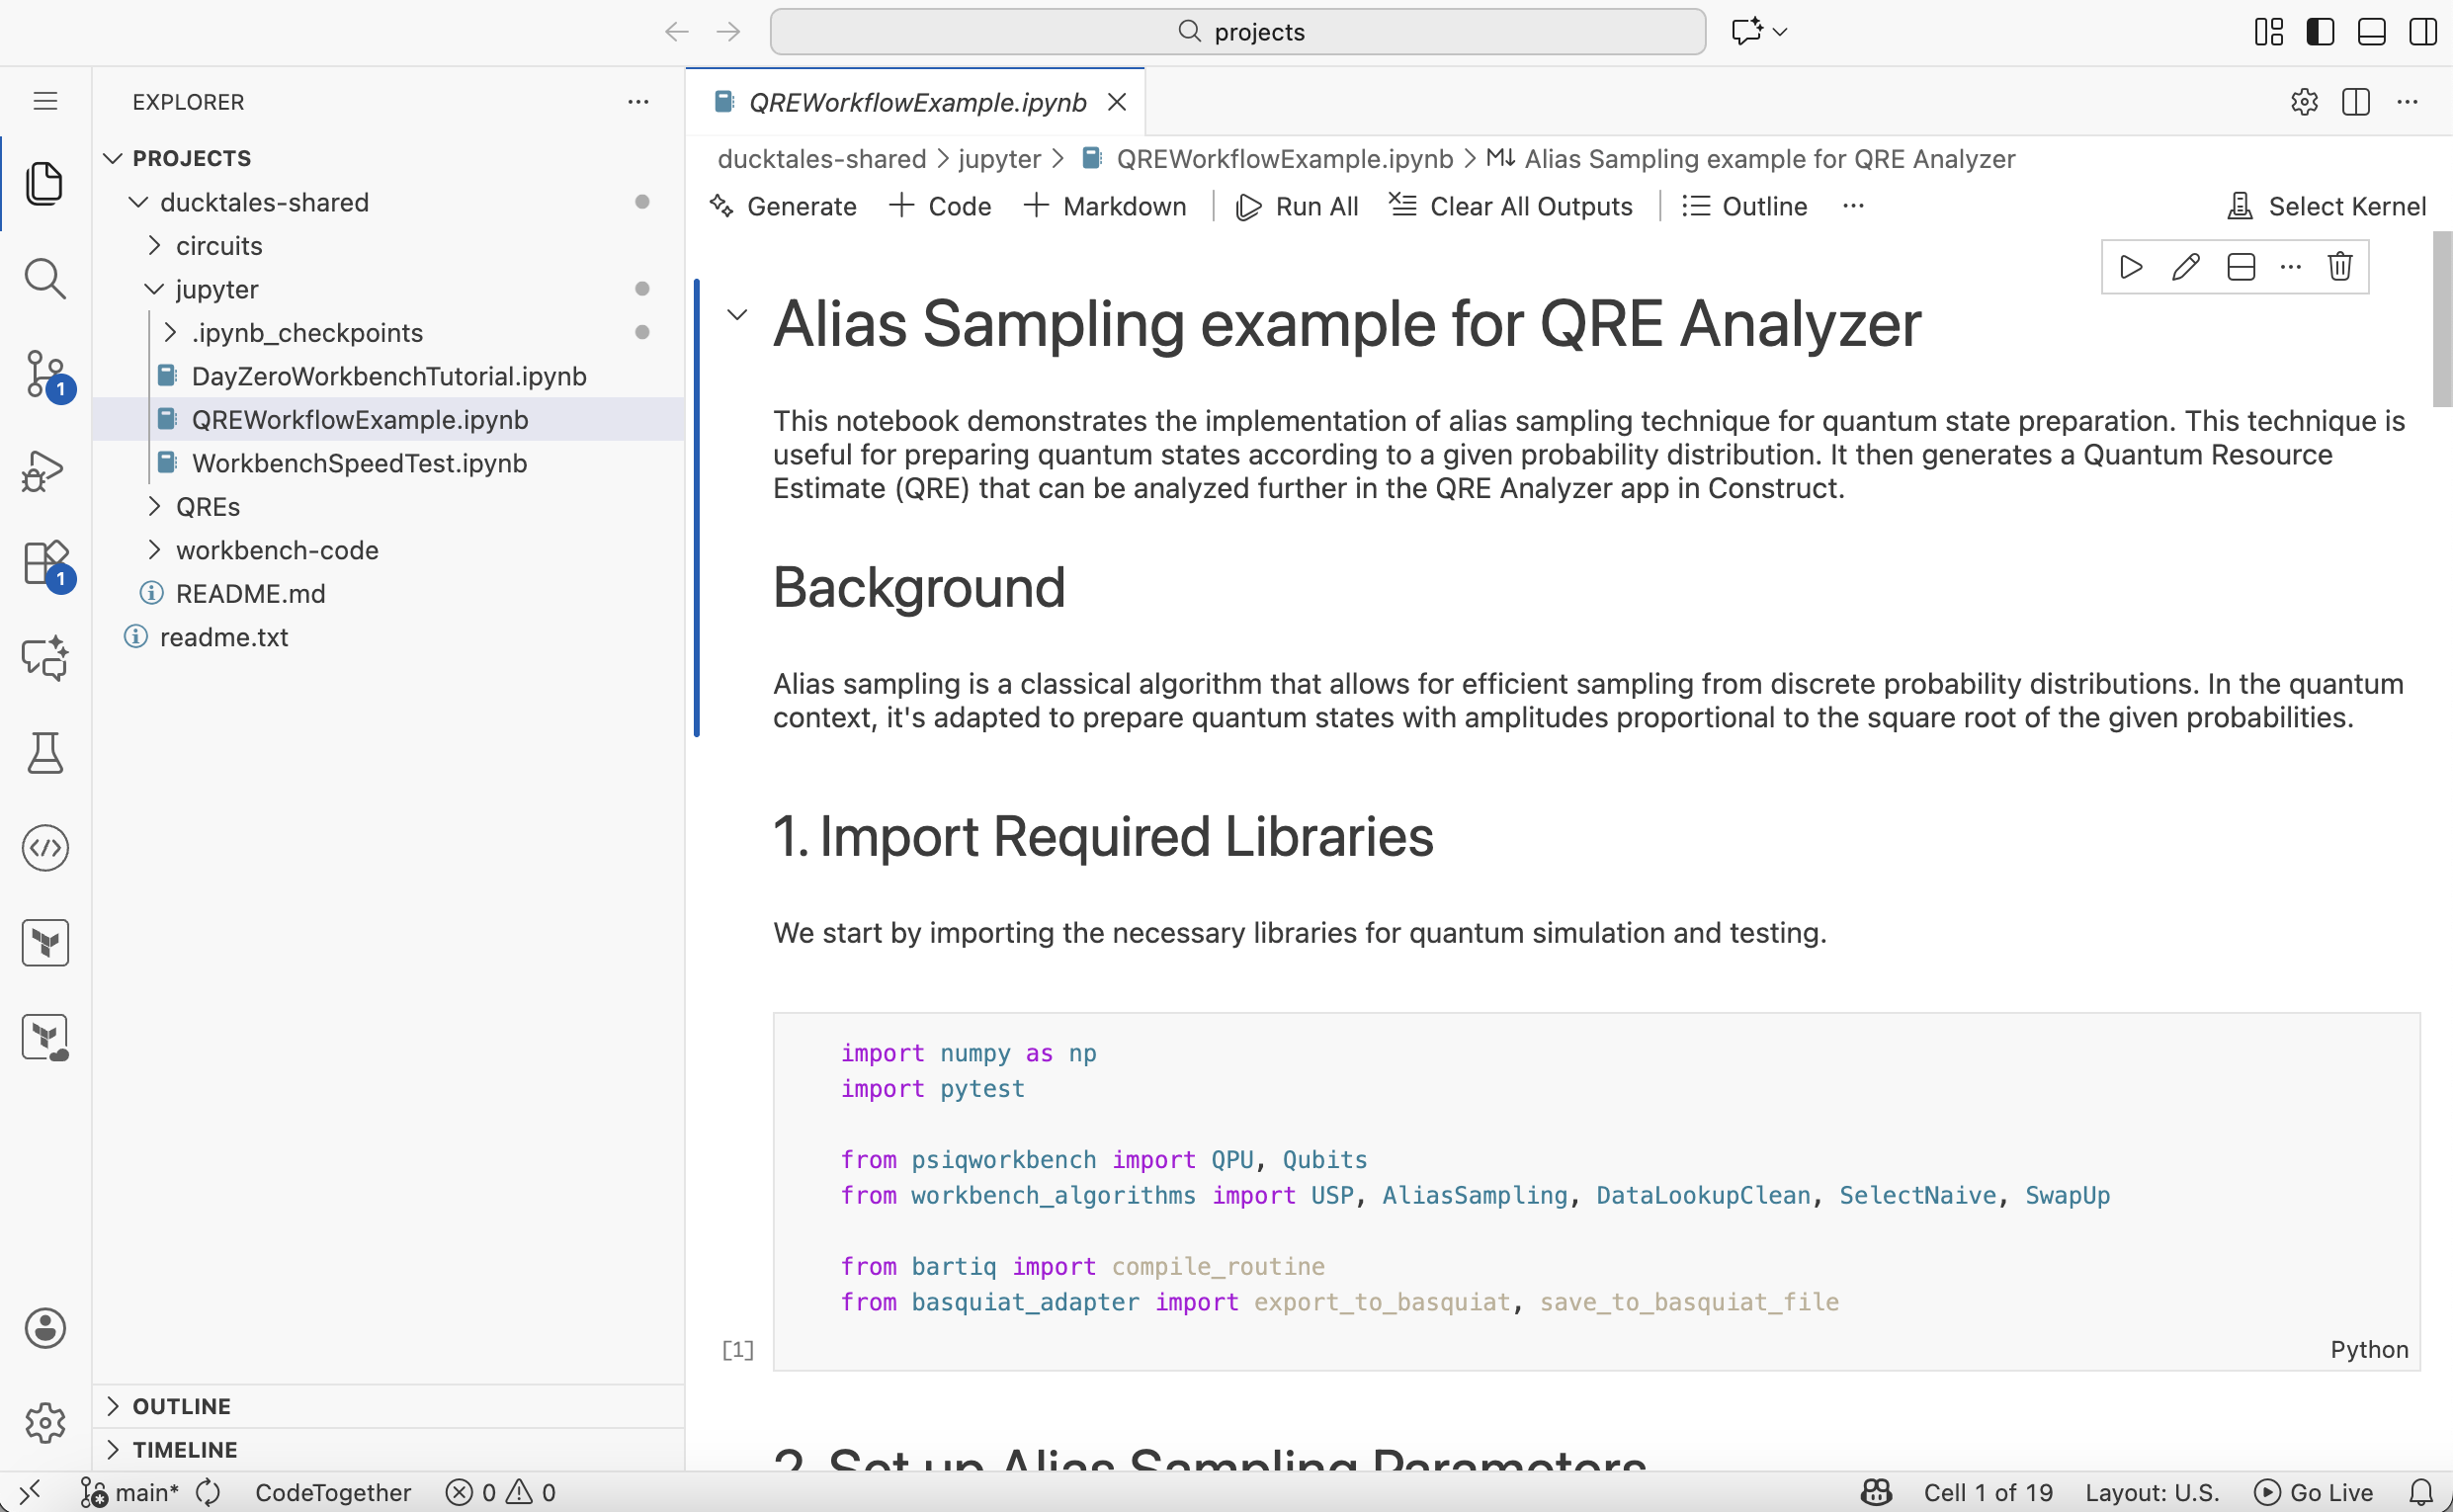
The interface includes:
- File Explorer: Navigate your project files and folders in the left sidebar
- Editor Tabs: Open and Edit multiple files simultaneously with syntax highlighting
- Integrated Terminal: Access the command line directly within the editor
- Extensions Panel: Access pre-installed Construct-specific extensions
- Git Integration: Engage in version control operations with a built-in interface
Working with Jupyter Notebooks in VS Code
VS Code Web provides excellent support for Jupyter notebooks with kernel selection and execution:
Step 1: Select Kernel
When opening a Jupyter notebook (.ipynb file), VS Code will prompt you to select a kernel:

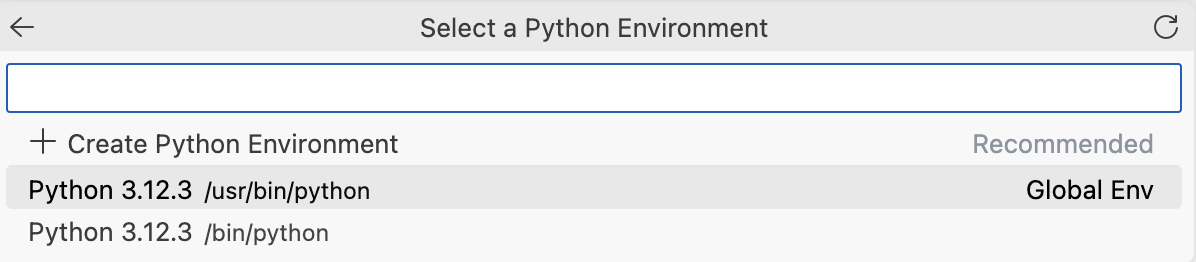
Step 2: Choose Python Environment
Select the appropriate Python environment for your notebook:
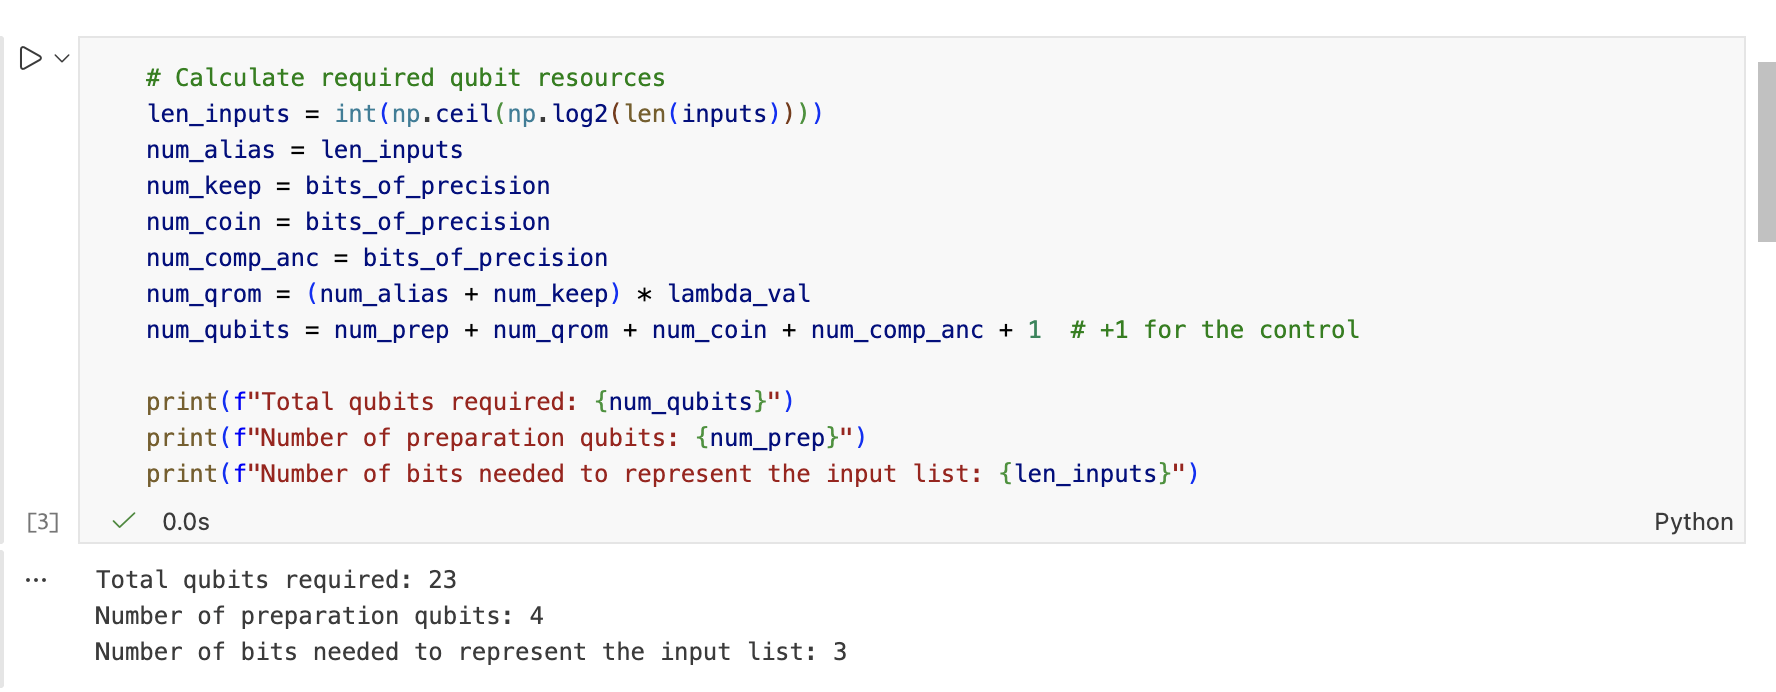
Step 3: Working Notebook
Once configured, you can execute cells and see outputs directly in VS Code:
QDE-Specific Behaviors
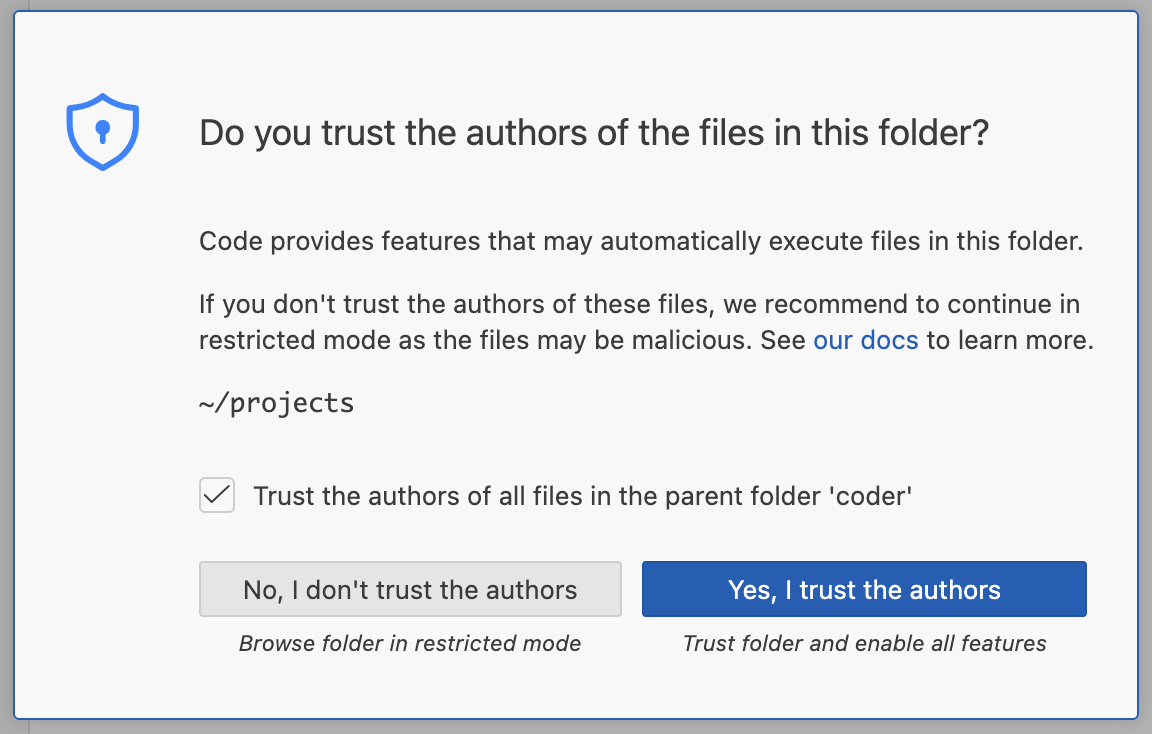
When first opening VS Code Web, you may encounter a security prompt asking if you trust the authors of files in the workspace folder. This appears because QDE automatically mounts your /home/coder/projects directory containing your Construct projects. Click Yes, I trust the authors to enable full functionality including extension loading and terminal access.
The editor automatically opens in your projects directory, providing immediate access to all cloned repositories. File changes are saved locally within your workspace and persist between sessions.
Learning VS Code
For comprehensive VS Code tutorials and feature documentation, visit the official VS Code documentation ⧉. QDE uses the standard VS Code interface without modifications to core functionality.
VS Code App
VS Code App connects your locally installed VS Code editor to your cloud QDE workspace, providing the familiar desktop experience while leveraging cloud computing resources.
Benefits of VS Code App
Using VS Code App provides access to local system resources while maintaining your development environment in the cloud. This enables features like local file system access for uploading files and integration with local development tools.
Setup Requirements
To use VS Code App, you need VS Code installed on your local machine. Download from code.visualstudio.com ⧉ if not already installed.
Connection Process
Click VSCode App from your QDE workspace panel to initiate the connection. This opens a VS Code window on your desktop that remotely connects to your cloud workspace. Your local VS Code will prompt to install the Remote Development extension if not already present.
QDE-Specific Behaviors
The first connection may require additional permission confirmations as VS Code establishes the remote connection to your cloud workspace. These security prompts ensure safe access to your cloud development environment.
Local VS Code settings and extensions sync with your cloud workspace, providing a consistent development experience. However, workspace-specific configurations remain in the cloud and persist between sessions.
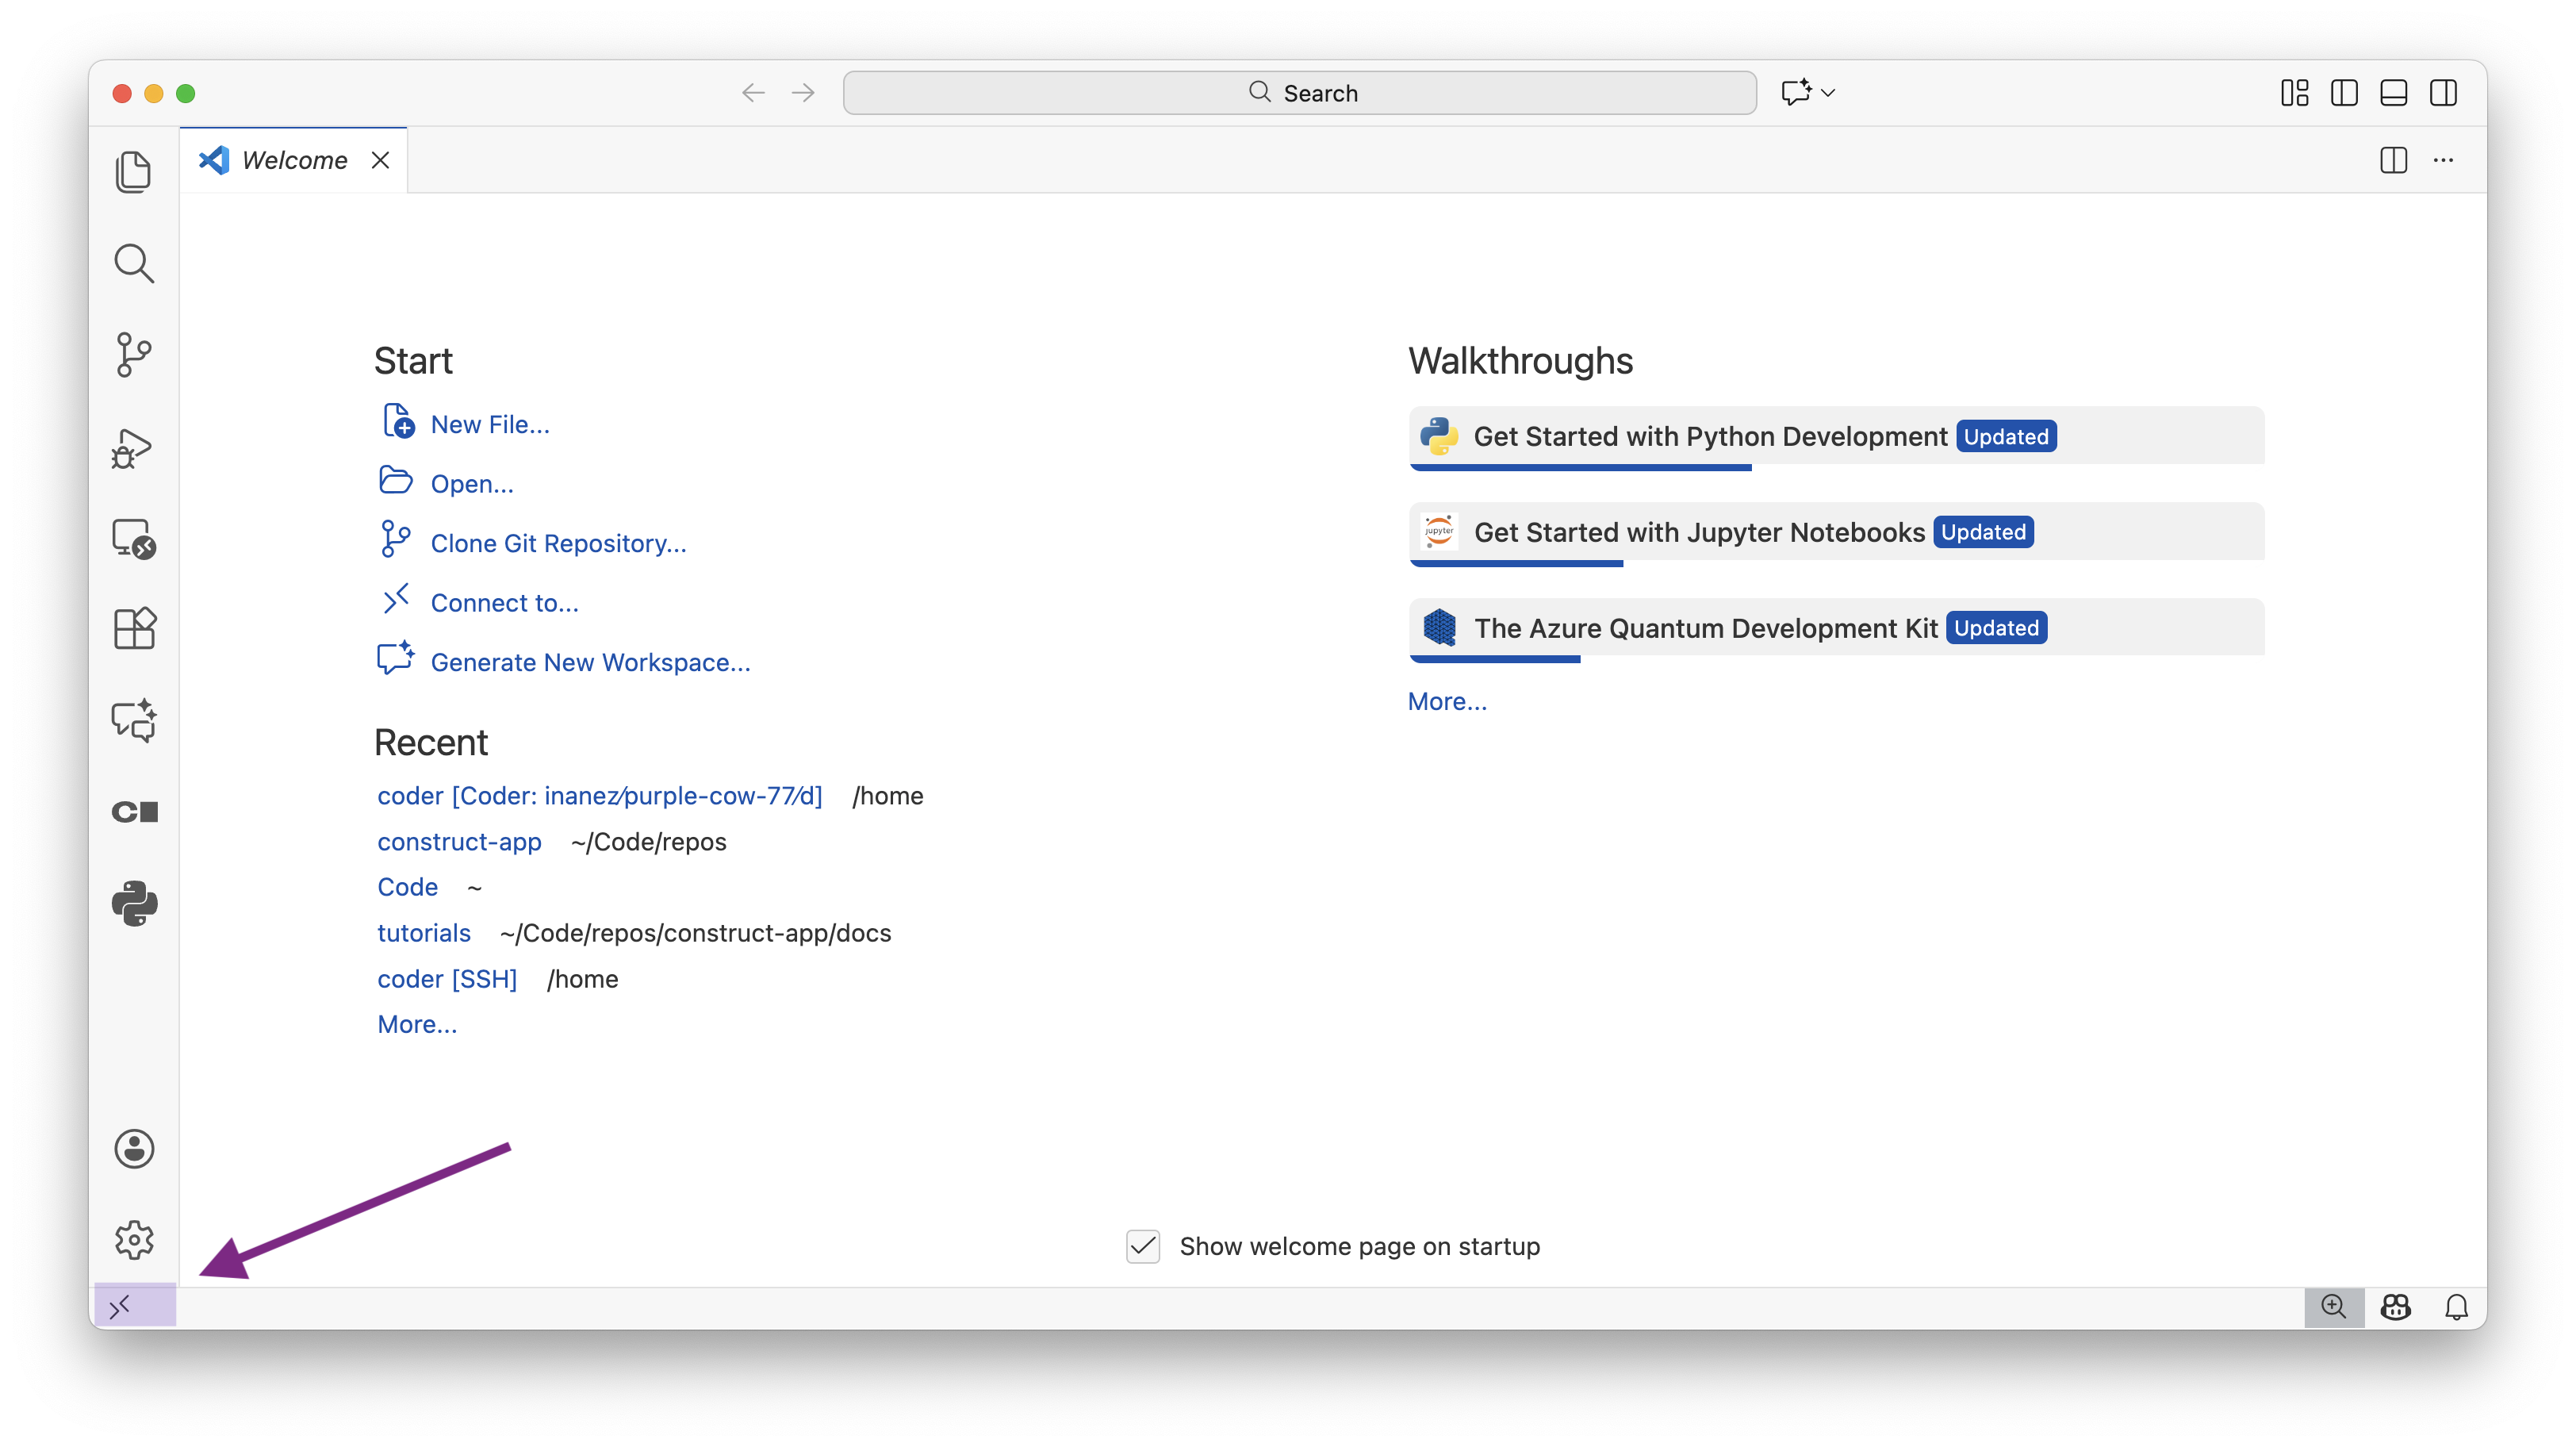
Depending on your VS Code configuration, it is possible for the desktop app to not automatically connect to the QDE. If this happens, you can connect your app to VS Code by following these steps:
- Wake your QDE and click on VS Code App
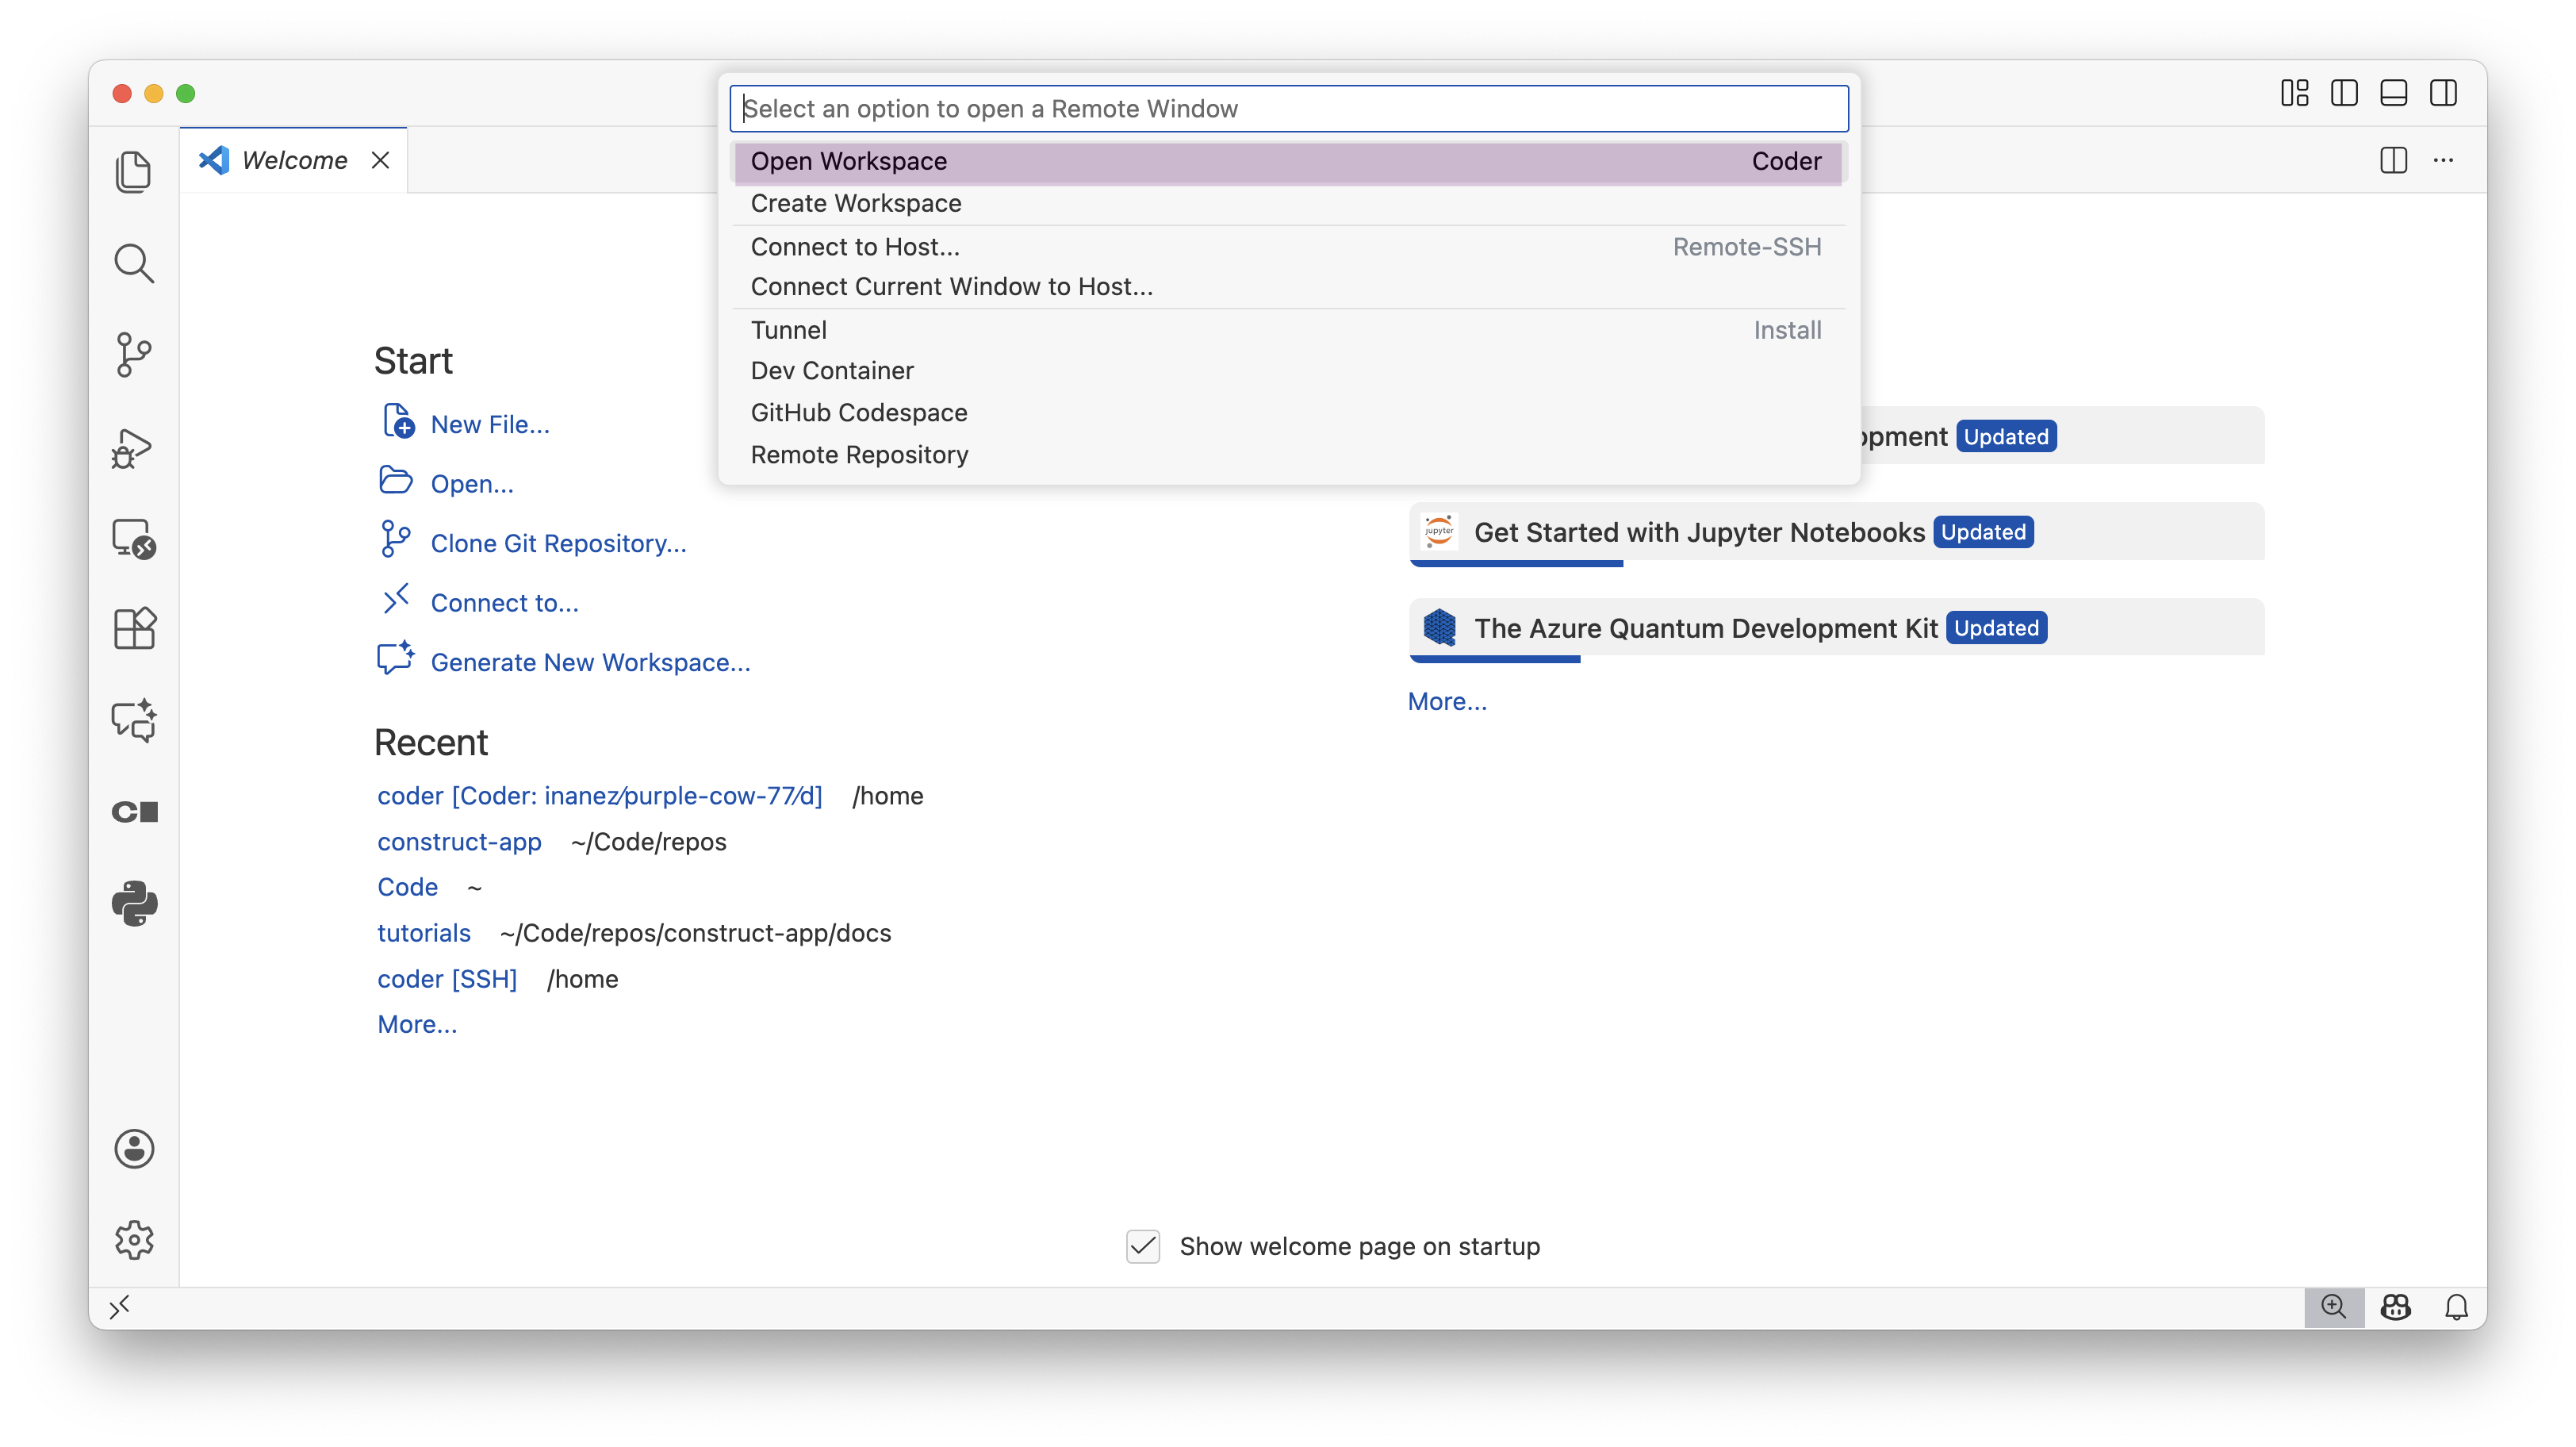
- In VS Code App, click on the connect to Remote Window button on the bottom left hand side of the application
- Click on Open Workspace
- Select your named QDE
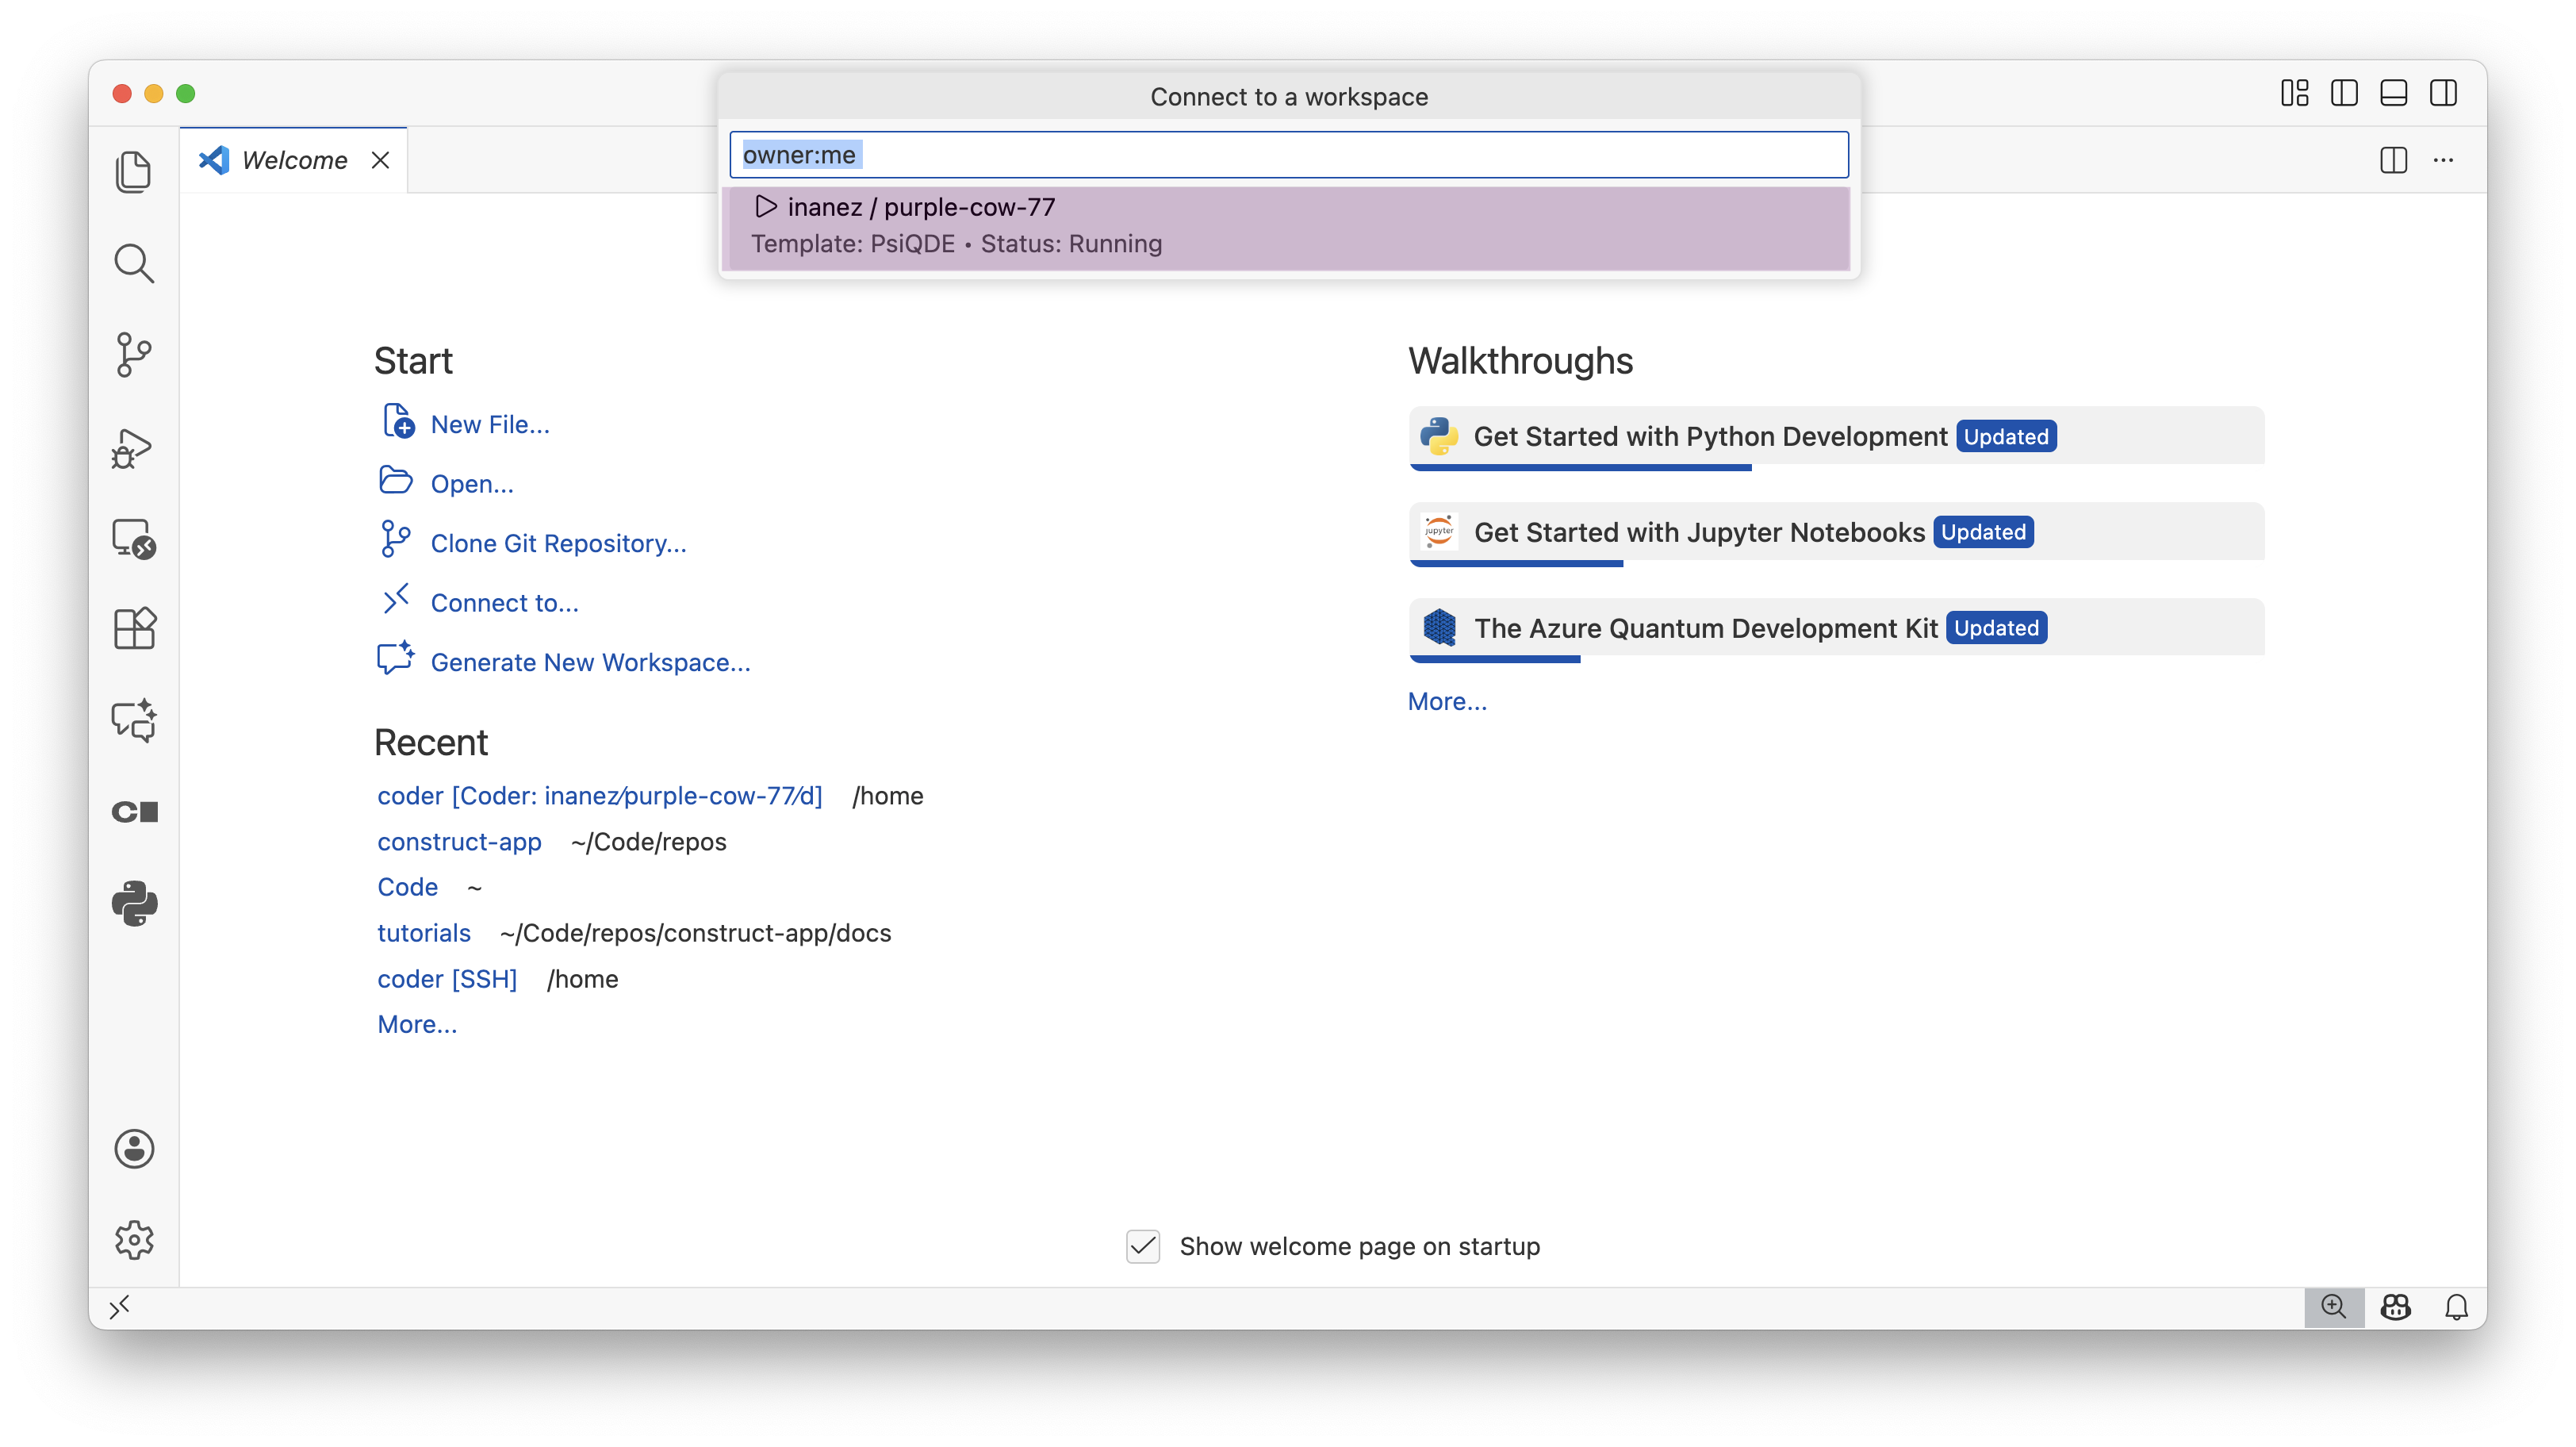
- Use the QDE on VS Code App
Jupyter Lab
Jupyter Lab provides an interactive development environment optimized for data science, exploratory programming, and documentation.
Jupyter Lab Interface
Jupyter Lab provides a flexible workspace for interactive development and data analysis:
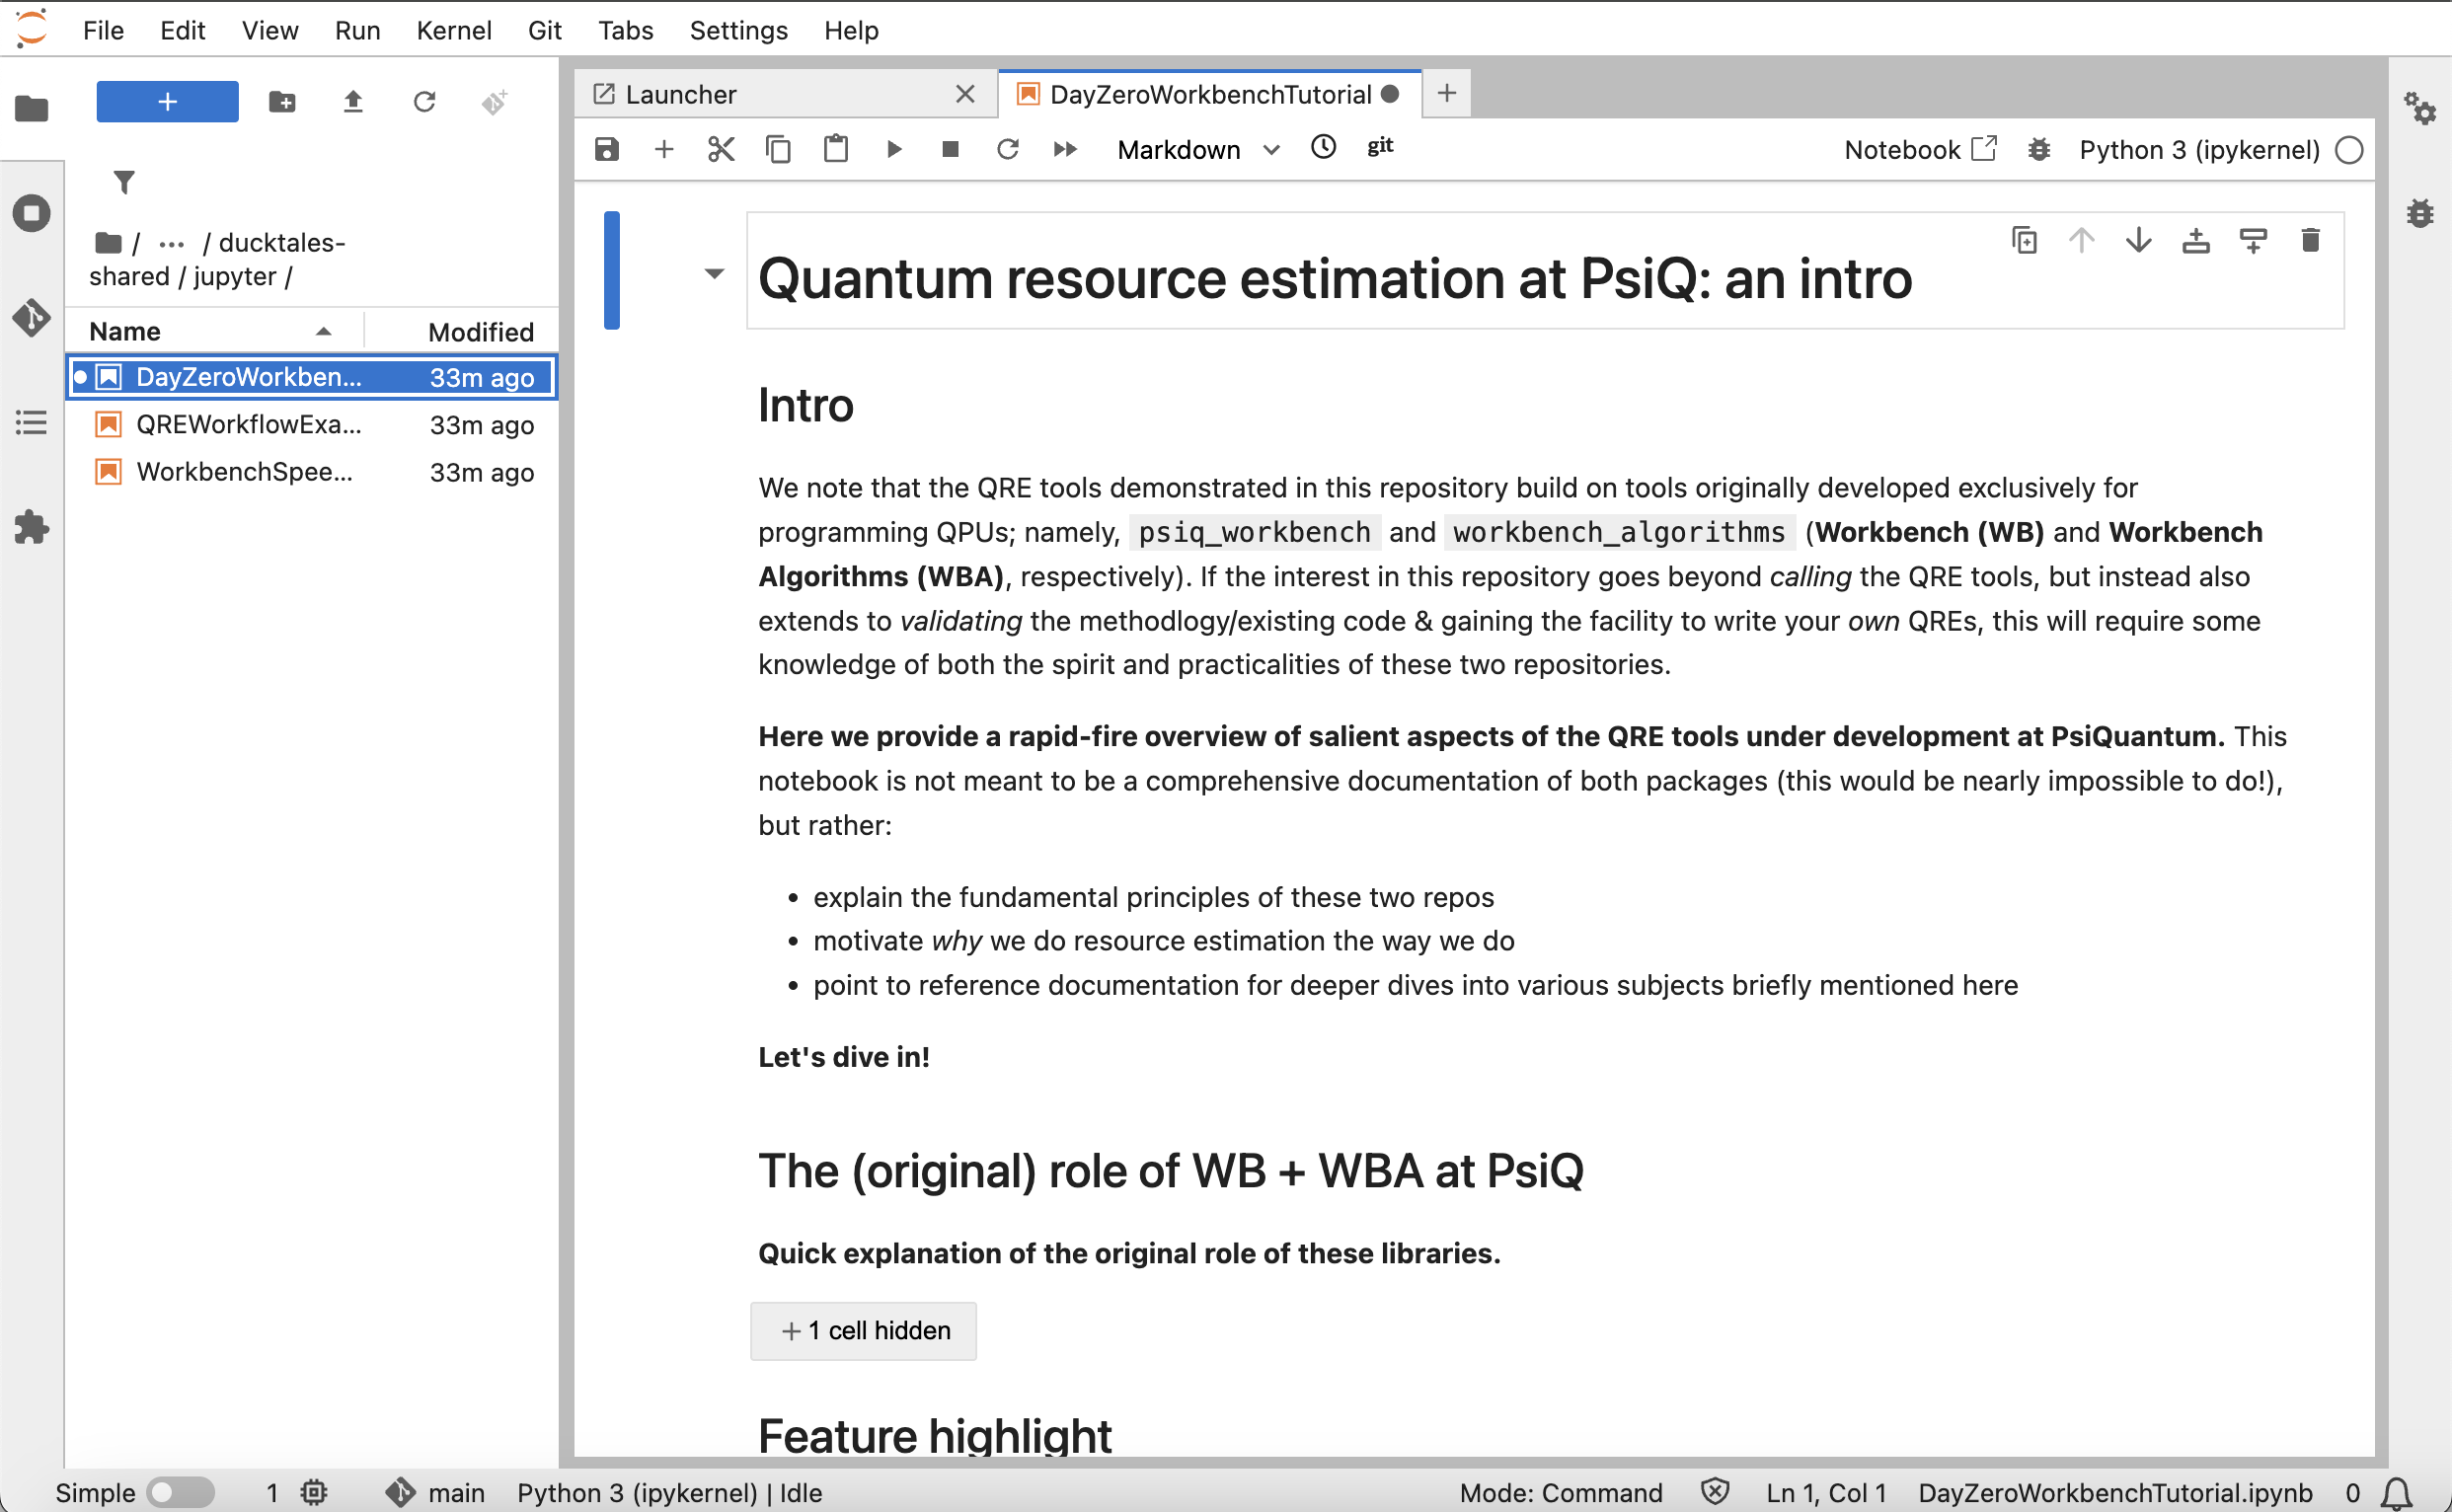
The interface includes:
- File Browser: Navigate project files and create new notebooks in the left sidebar
- Notebook Editor: Develop in interactive cells for code, markdown, and rich outputs
- Kernel Management: Manage python kernels with quantum libraries pre-configured
- Terminal Access: Access an integrated terminal for command-line operations
- Extension Manager: Use additional tools and extensions available through the interface
Working with Notebooks
Create new notebooks by clicking the Python 3 kernel in the launcher. Each notebook cell can contain code, markdown, or raw content. Use Shift+Enter to execute cells and display results inline.
Jupyter Lab supports collaborative features through its built-in Git integration. Save notebooks to your project repository for sharing with team members and version control.
QDE-Specific Configuration
Jupyter Lab in the QDE includes pre-configured kernels for Python with all quantum libraries available. Create notebooks for interactive development, markdown documentation, and rich output including plots and visualizations. The interface supports multiple file formats and provides integrated access to your project files.
Jupyter Lab automatically starts in your /home/coder/projects directory, providing immediate access to your Construct projects. Git integration is pre-configured, allowing you to commit and push changes directly from the Jupyter interface.
The environment includes matplotlib for visualization, making it ideal for quantum algorithm analysis and result presentation. All PsiQDK libraries are available in notebook cells without additional configuration.
Learning Jupyter Lab
For detailed Jupyter Lab tutorials and advanced features, refer to the official Jupyter Lab documentation ⧉. The QDE provides the standard Jupyter Lab experience with quantum-specific libraries pre-installed.
Terminal Access (advanced use)
Direct terminal access is available for advanced users who need command-line access to the workspace environment. The terminal provides full access to the Ubuntu-based system with all quantum libraries and development tools.
Accessing Terminal
Click the Terminal button from your workspace panel to open a web-based terminal interface. This provides a bash shell with your home directory as the working location.
Available Tools
The terminal environment includes standard development tools like git, python, pip, and conda. All PsiQDK libraries are accessible from the command line, enabling scripting and automation workflows.
Use the terminal for advanced Git operations, package installation, system configuration, and running automated scripts. The environment persists between sessions, maintaining any installed packages or configuration changes.
File Synchronization
All interfaces access the same underlying file system, ensuring consistency across development environments. Changes made in any interface are immediately available in others. Your workspace maintains a single source of truth for all files and configurations.
Work seamlessly between interfaces based on task requirements. Start exploration in Jupyter Lab, transition to VS Code for implementation, and use terminal for deployment tasks.
Next Steps
- Working with Projects - Managing Git workflows across interfaces
- Software and Libraries - Installing additional packages
- Troubleshooting - Resolving interface-specific issues