Getting Started with Construct
This guide walks you through your first experience with Construct, from logging in to creating your first quantum circuit diagram in Circuit Designer.
Prerequisites
- You must be a member of an organization with access to Construct
- Google Chrome browser
- Your organization credentials
Accessing Construct
- Visit construct.psiquantum.com ⧉
- Click on Login and enter your username and password to sign in

Important
If you belong to multiple organizations, you'll be prompted to select which organization you want to access after logging in.
Navigating the Home Screen
After logging in, you will see the Construct dashboard. The dashboard displays your recent files, available projects, and important updates from PsiQuantum.
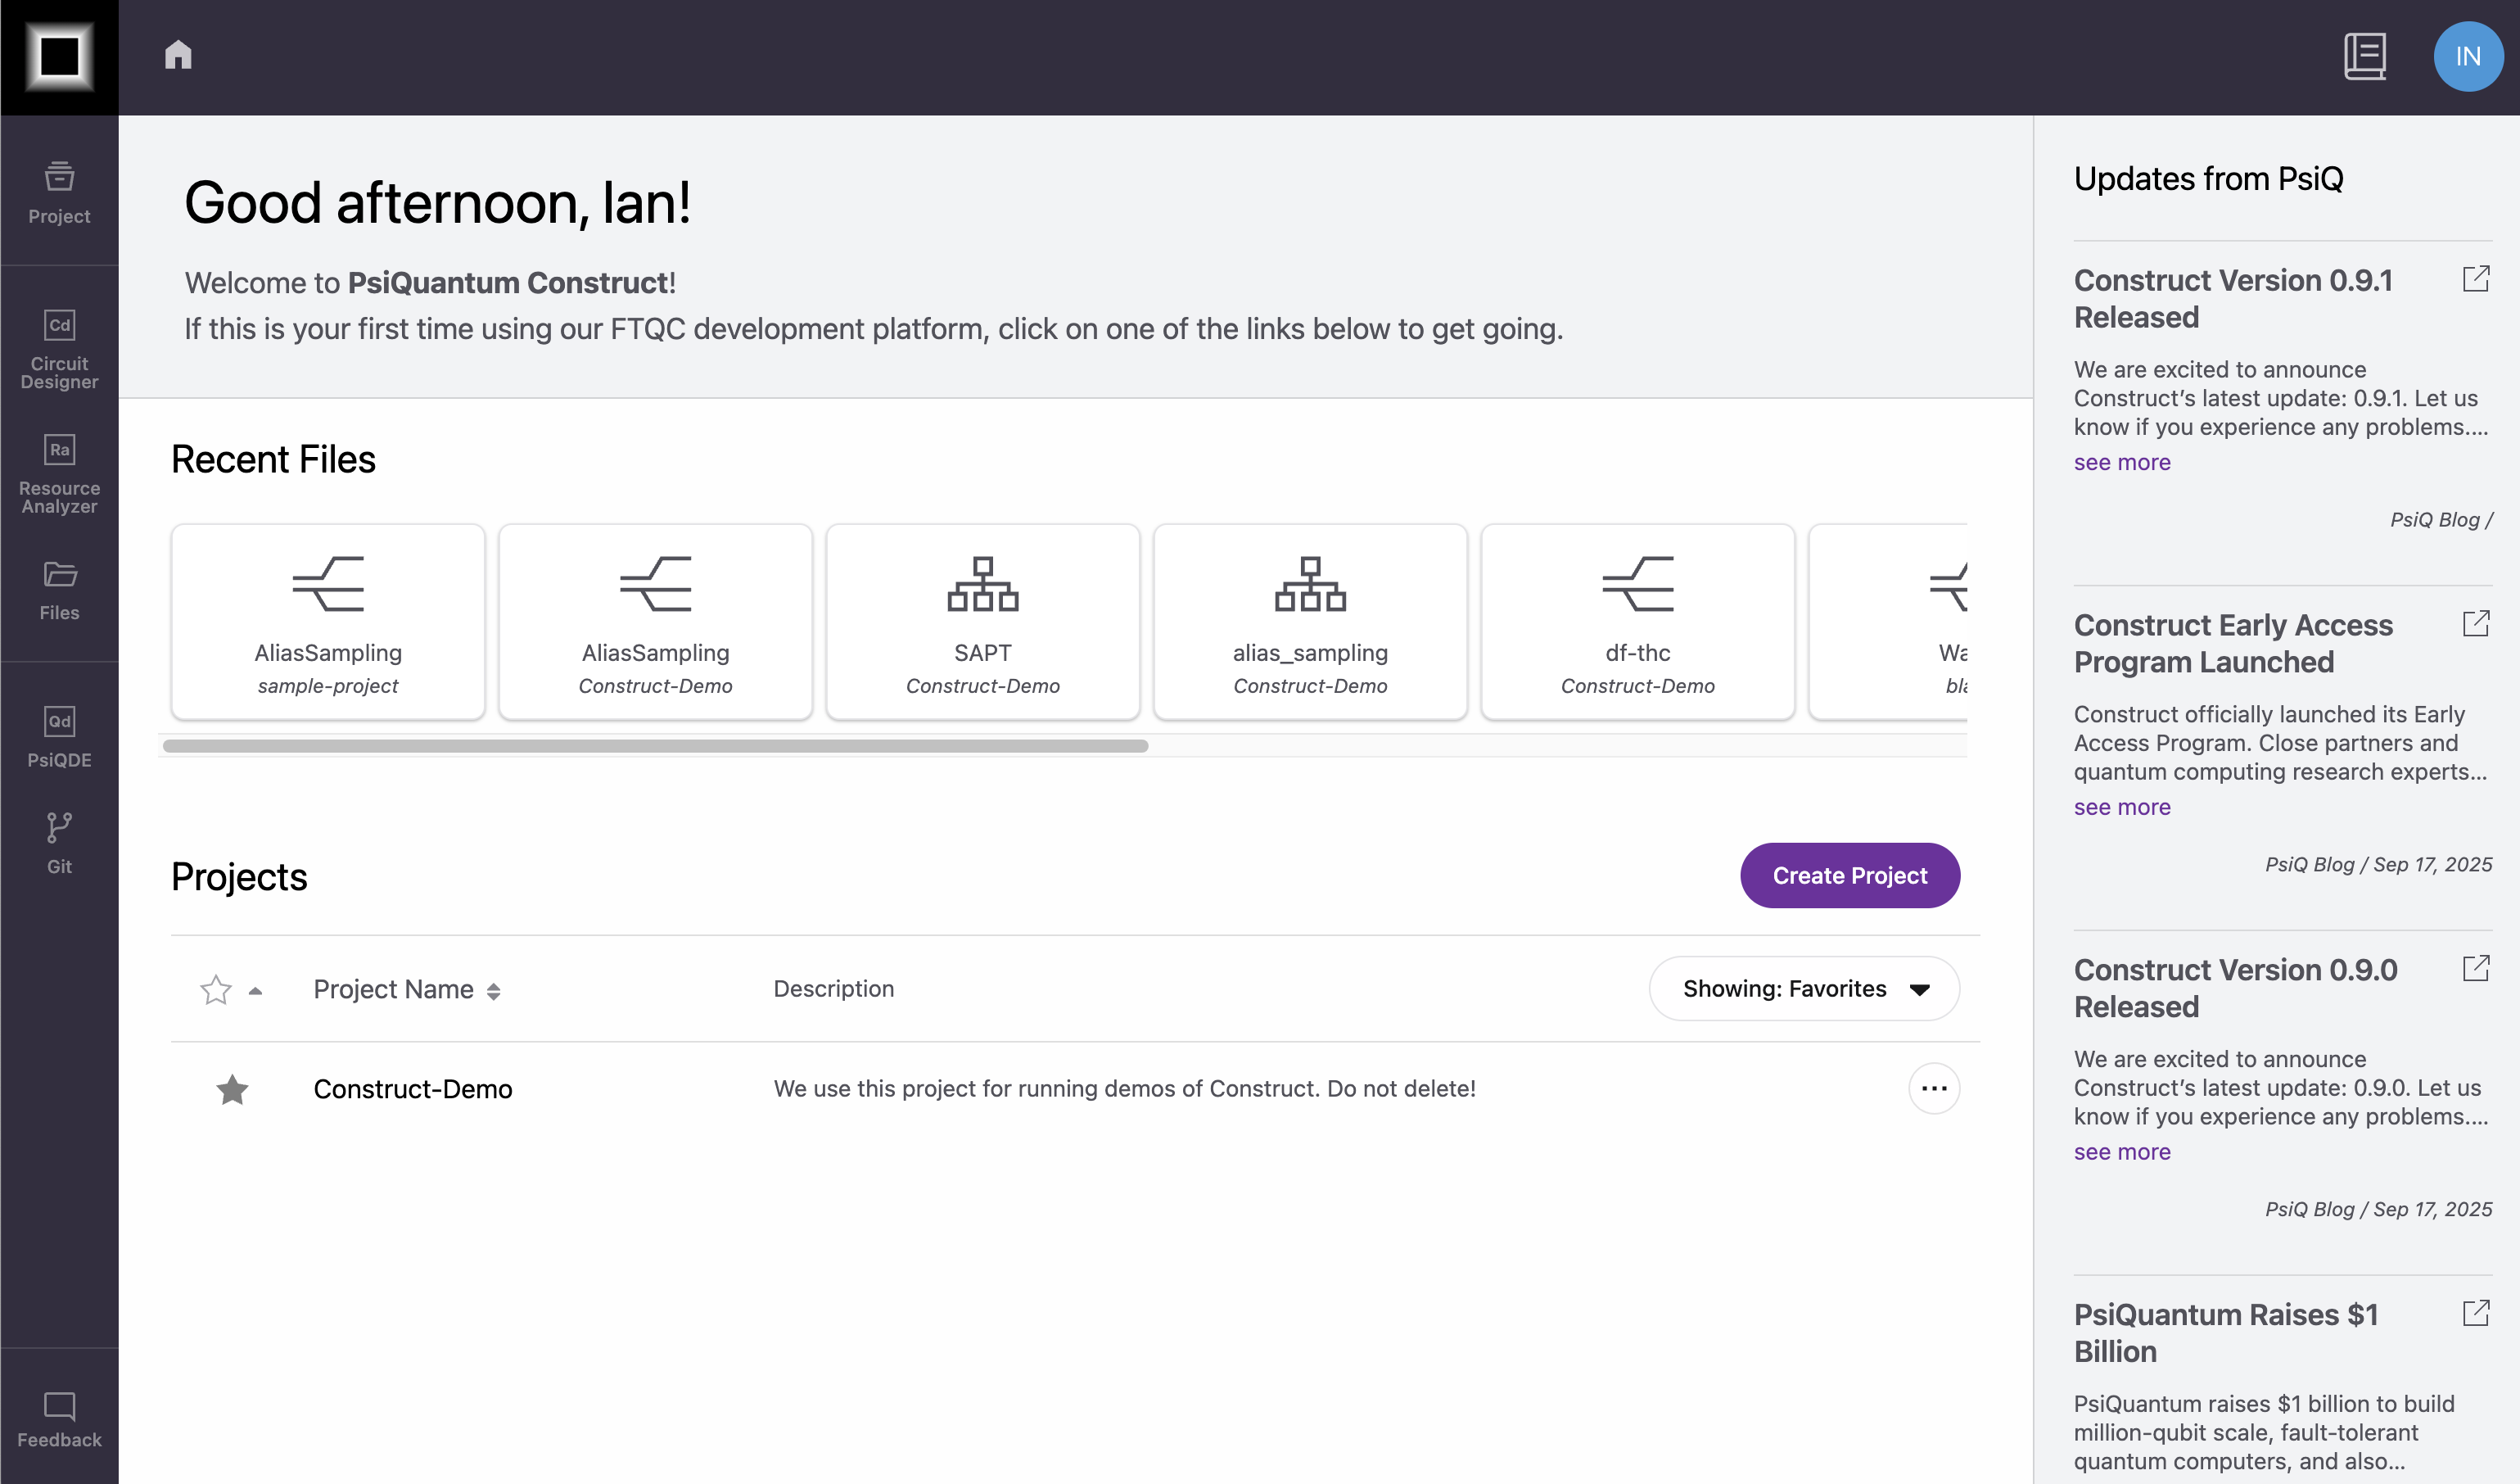
Creating Your First Project
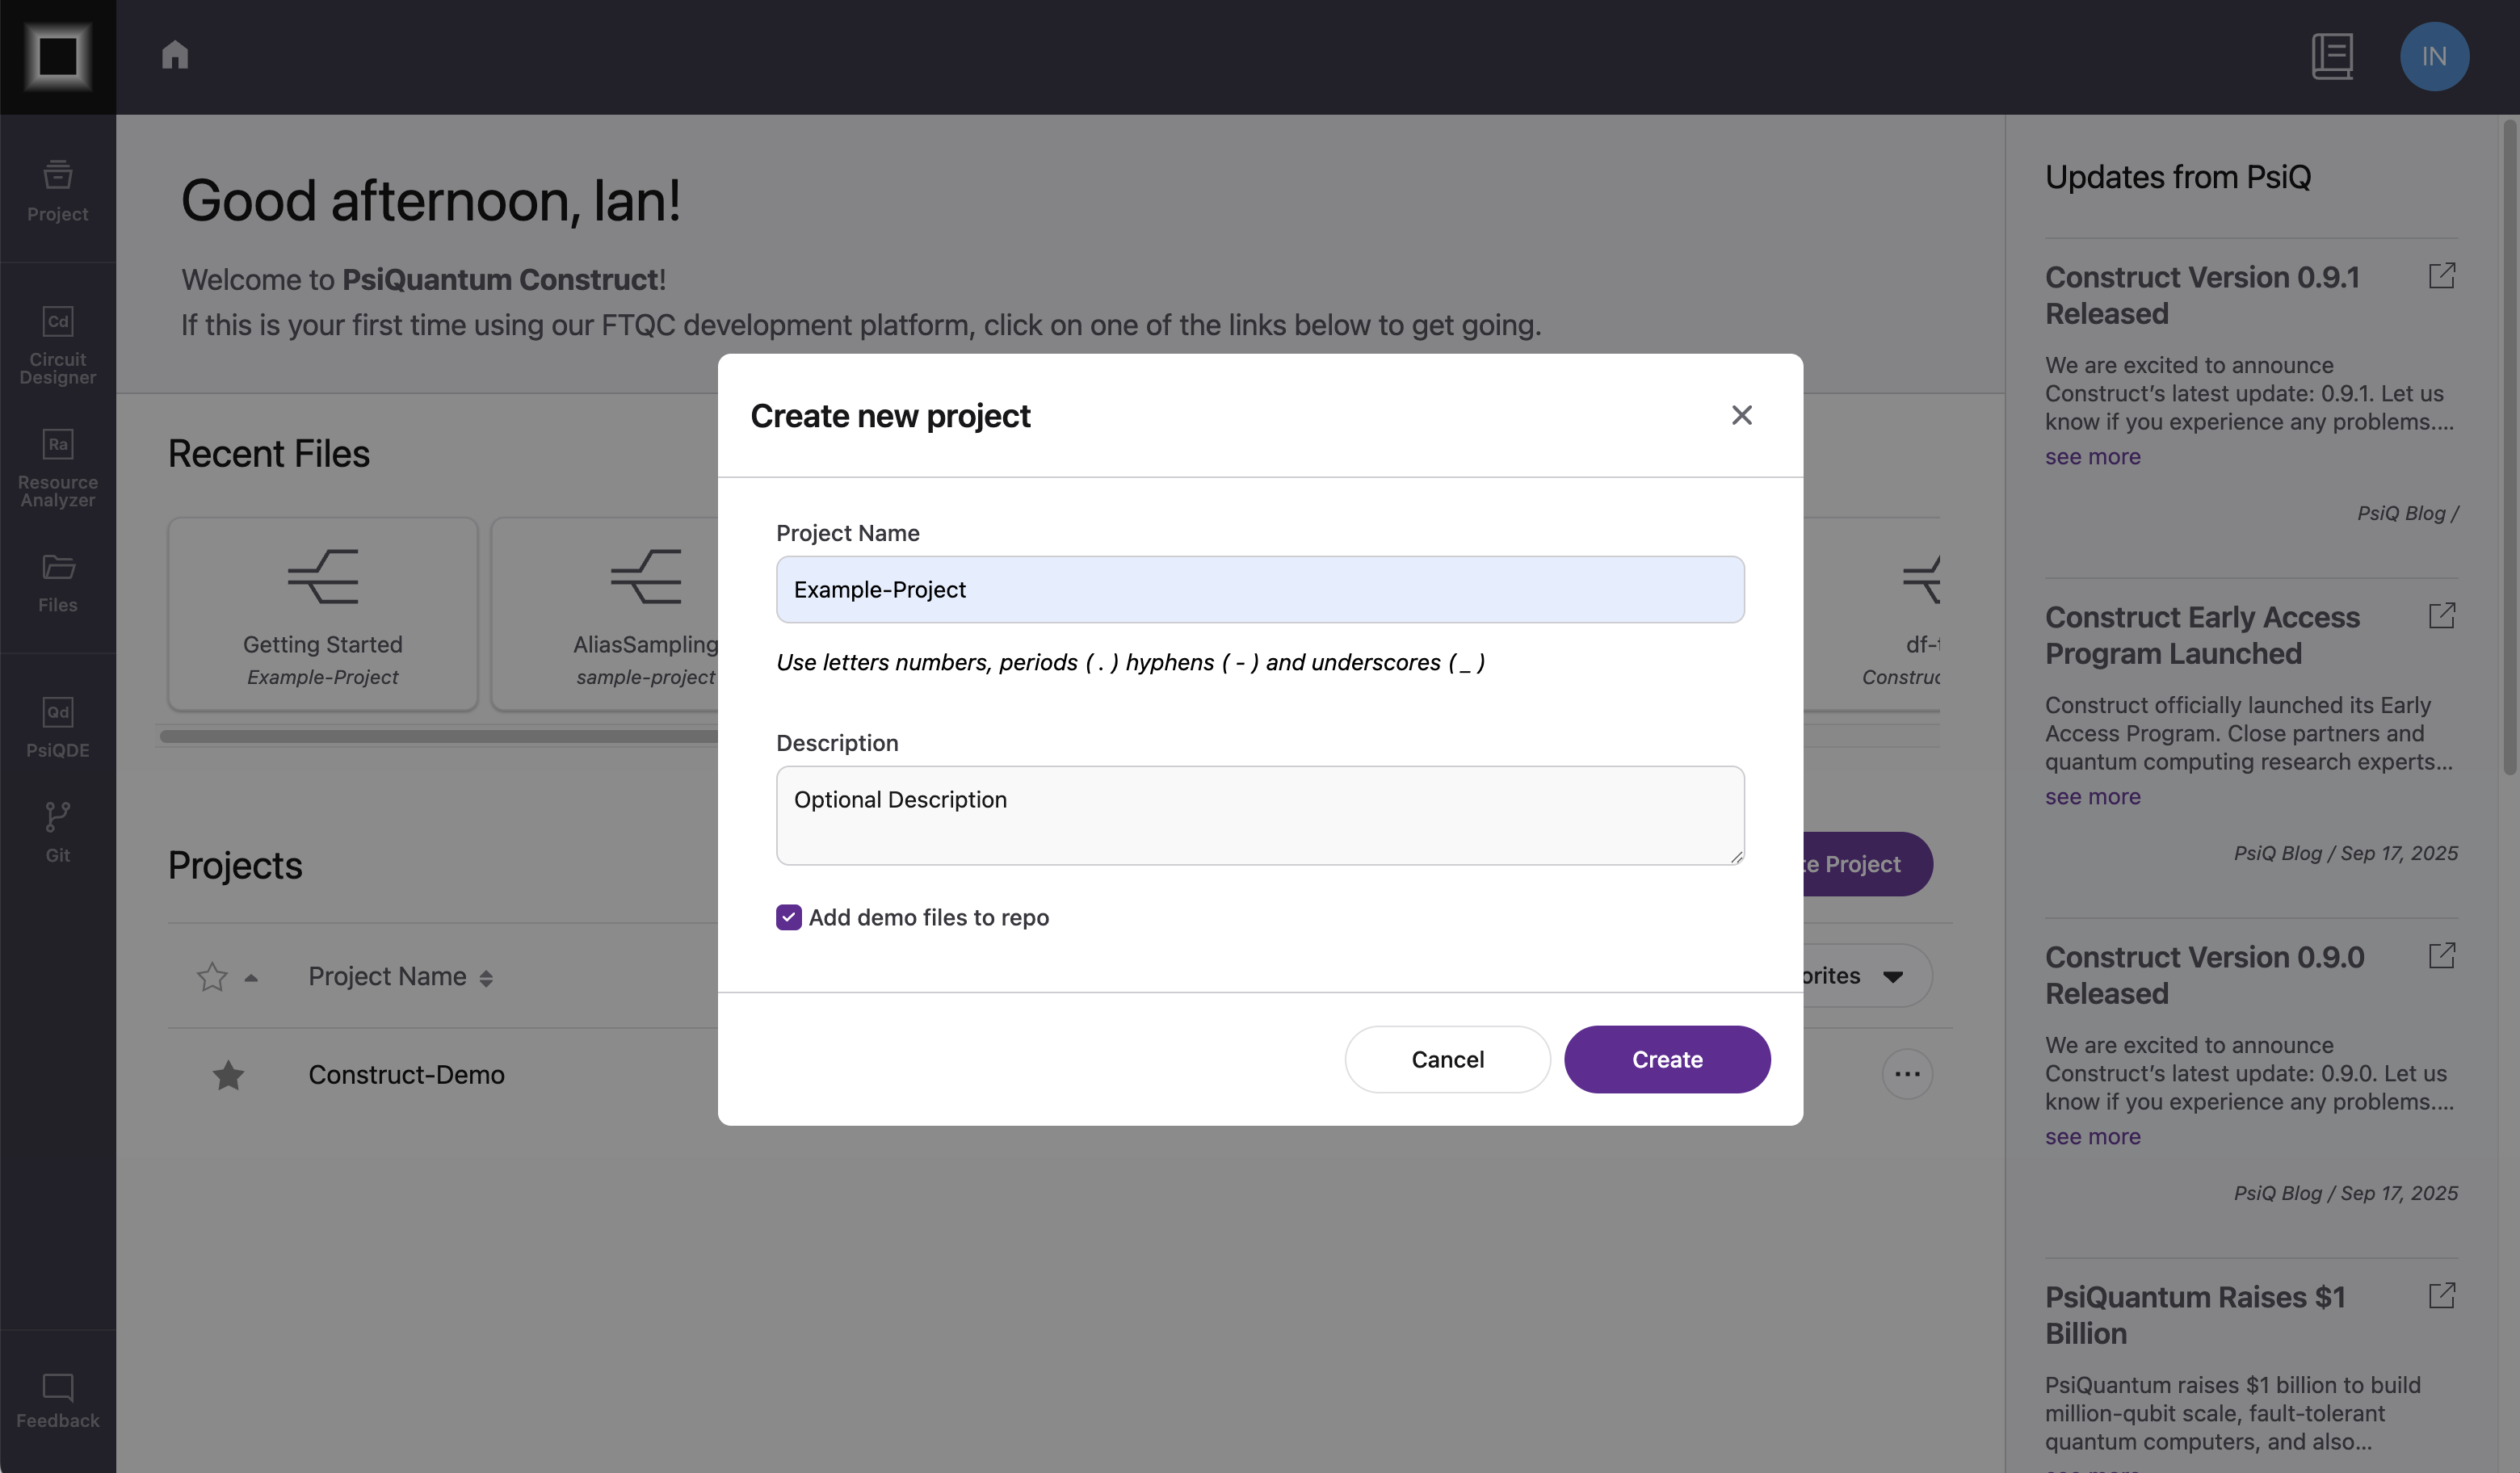
- Click Create Project in the top right of the Projects section
- In the Create Project dialog, enter your project details:
- Project Name: Enter a name using letters, numbers, periods (.) and hyphens (-)
- Description: (Optional) Add a brief description of your project
- Add demo files to repo: Select if you want the PsiQuantum demo files to be included in the Projects Git repository
- Click Create
Creating Your First Circuit
After creating your project, you can try using Circuit Designer to build a simple quantum circuit that demonstrates basic quantum operations.
Accessing Circuit Designer
You'll see the project dashboard with two main sections: Design and Develop.
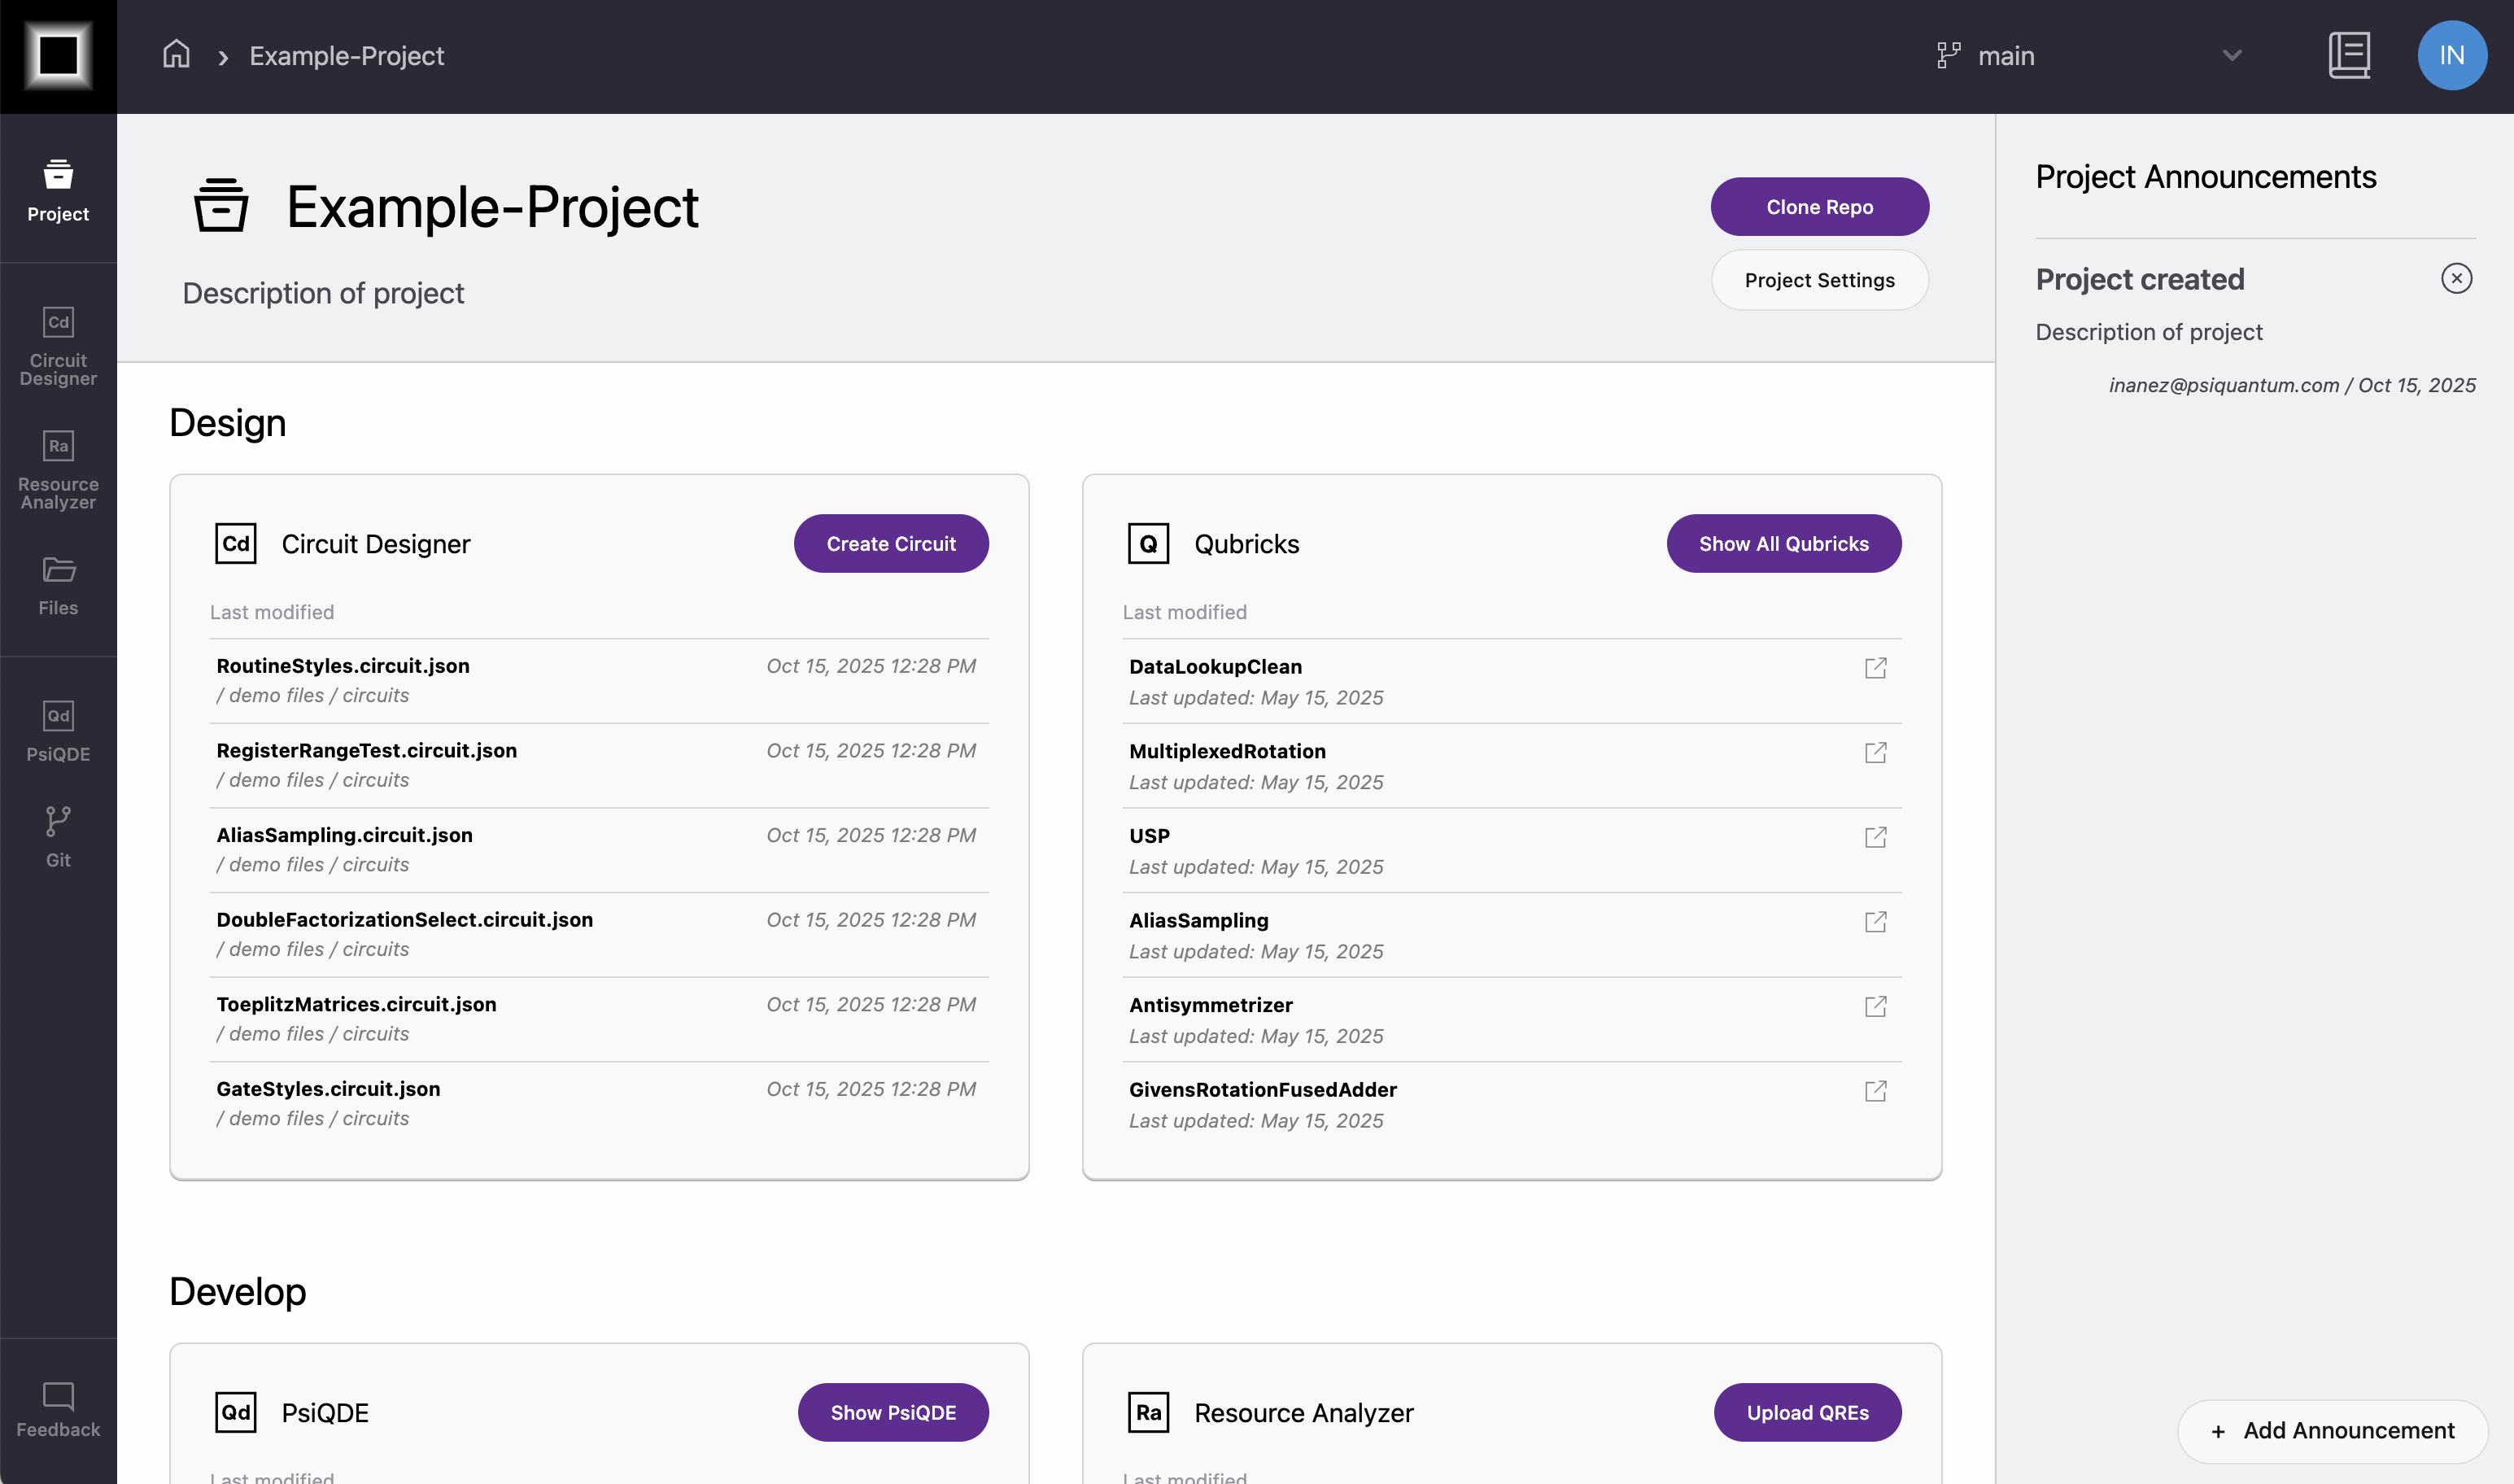
To create your first circuit:
- Locate the Circuit Designer card in the Design section
- Click Create Circuit
Tip
The project dashboard organizes tools by their primary function. Circuit Designer is found in the Design section, while tools like Resource Analyzer are in the Develop section.
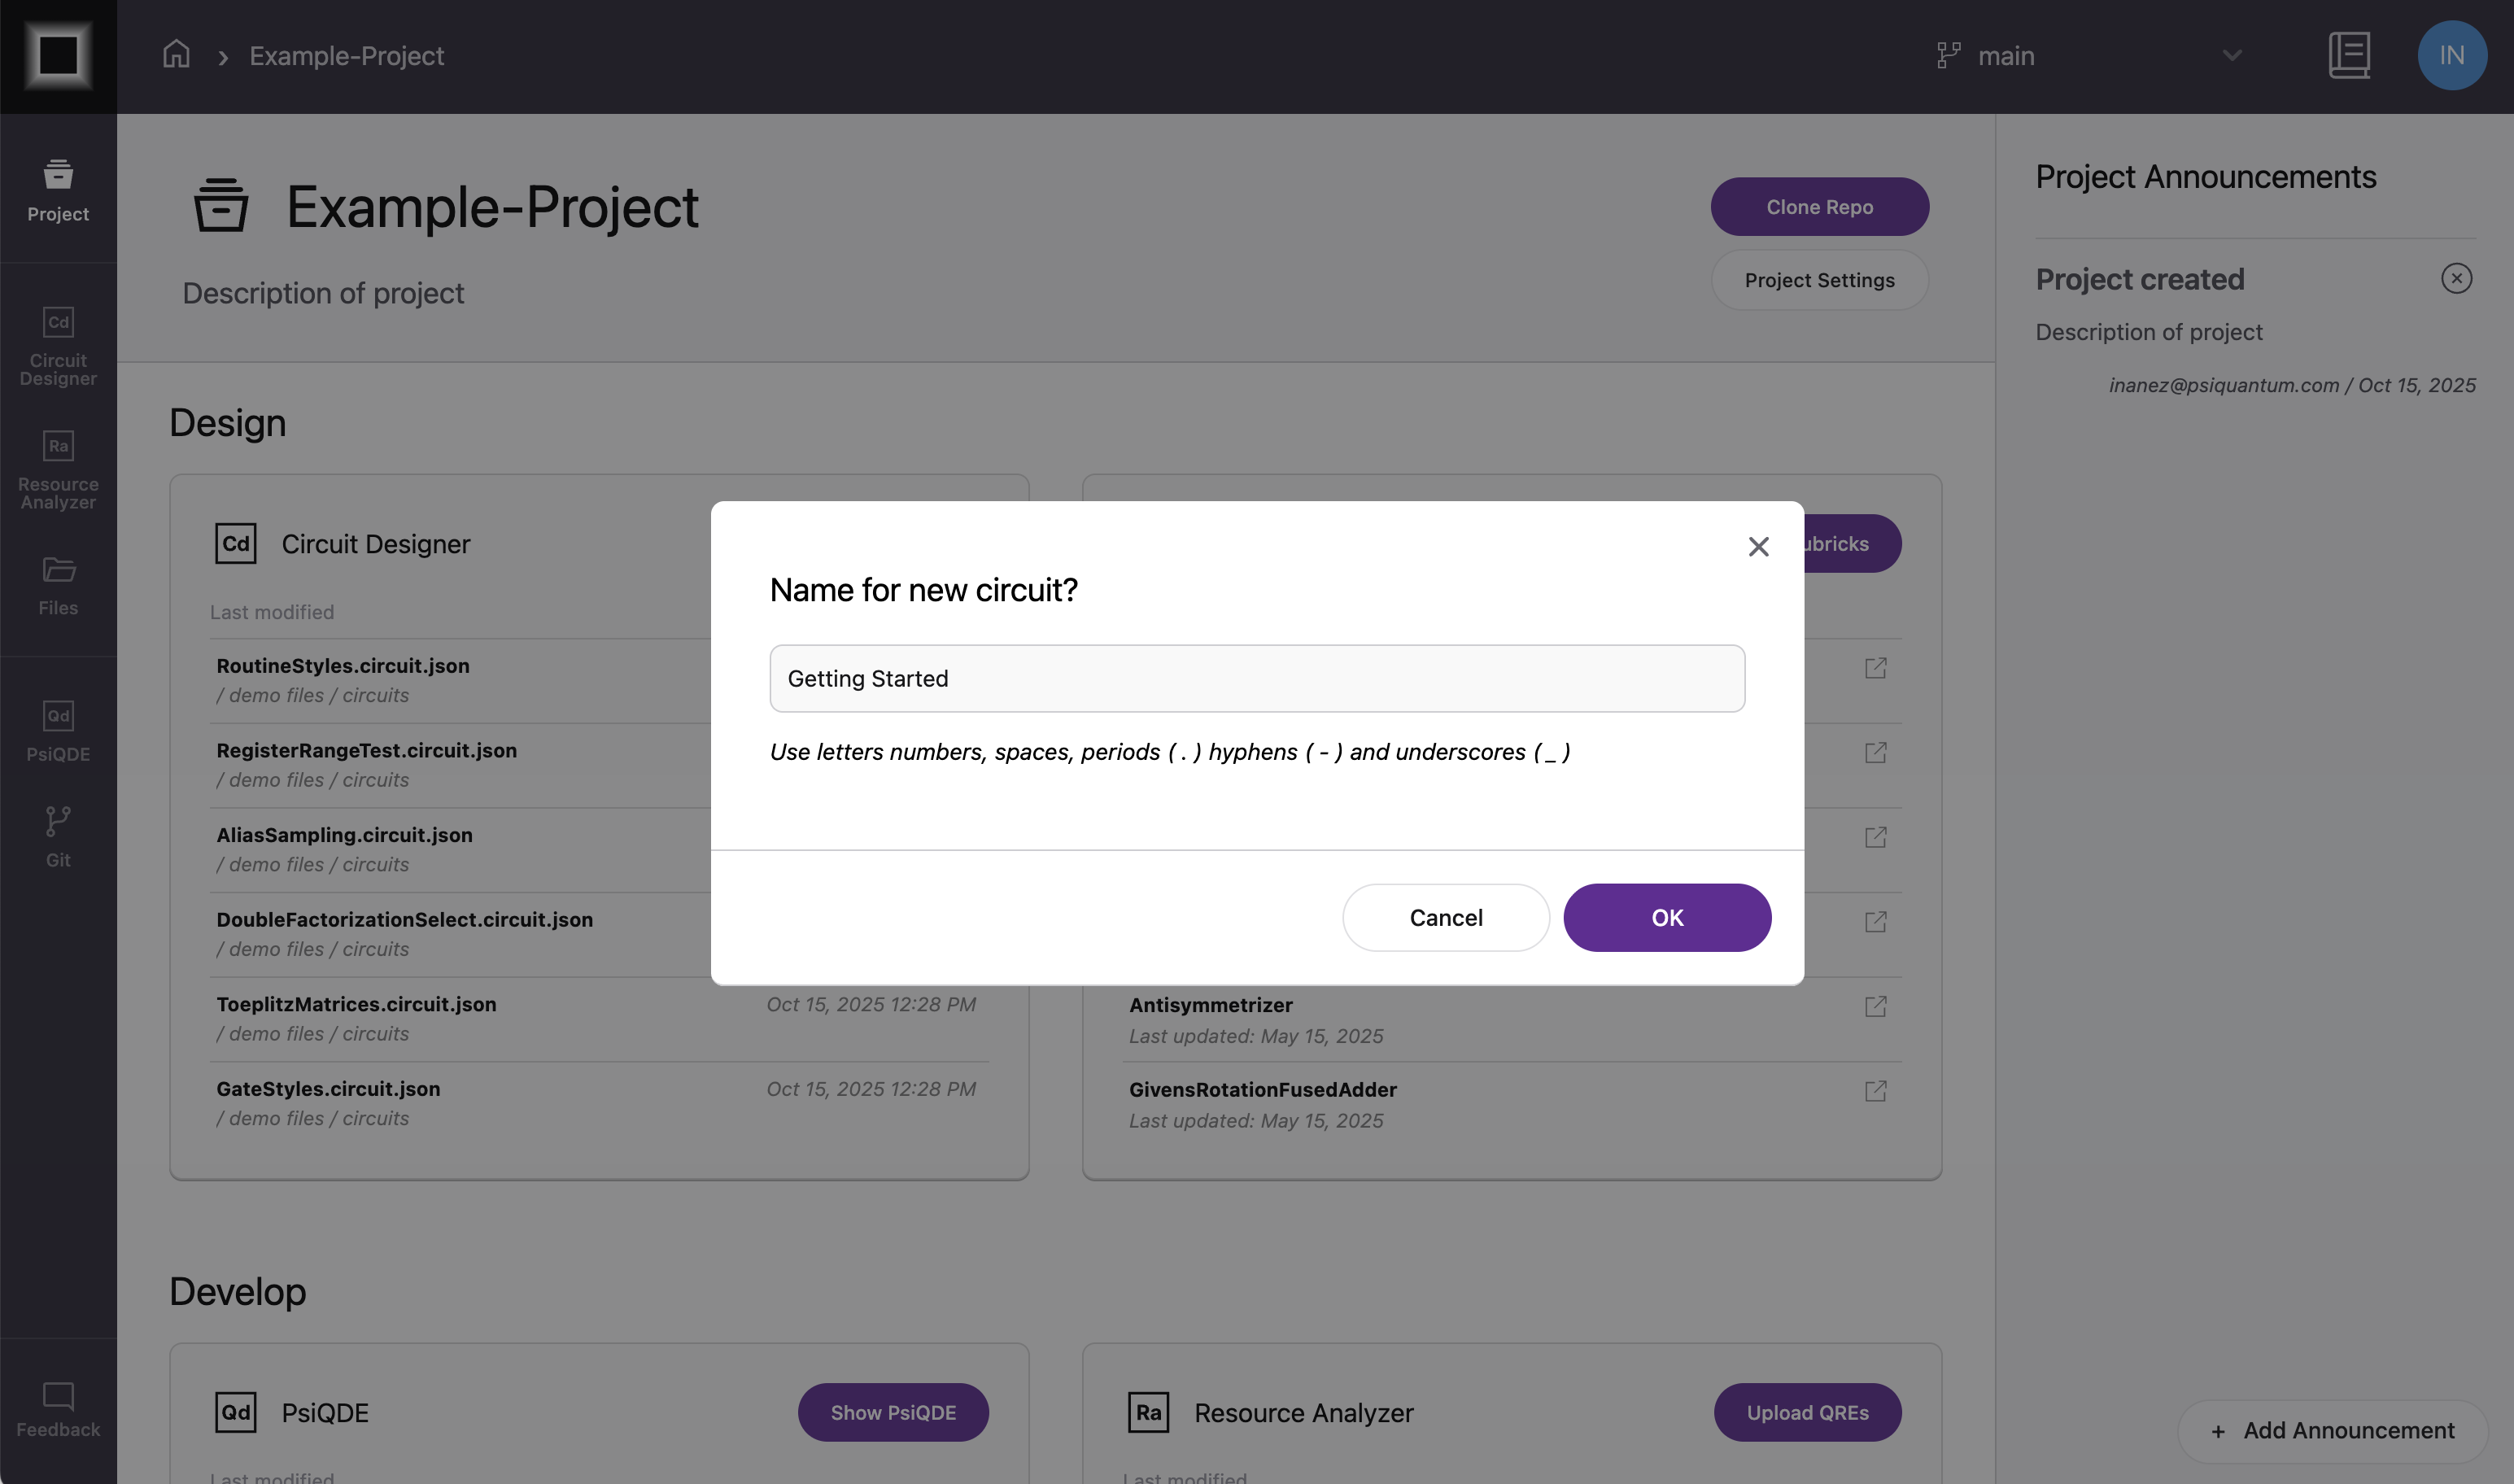
Creating a New Circuit
After clicking Create Circuit, you'll be prompted to name your circuit. Enter a name and click OK to open the Circuit Designer interface.
Edit a Quantum Register
- Set the following properties in the Register panel:
- Register label:
r1 - Rail Size:
2
- Register label:

Add a Hadamard Gate
- Click Add Gate
-
In the Gate panel:
- Set Gate Type to
hadamard - Set Target Registers to
r1[0]to apply the gate only to the first qubit
- Set Gate Type to
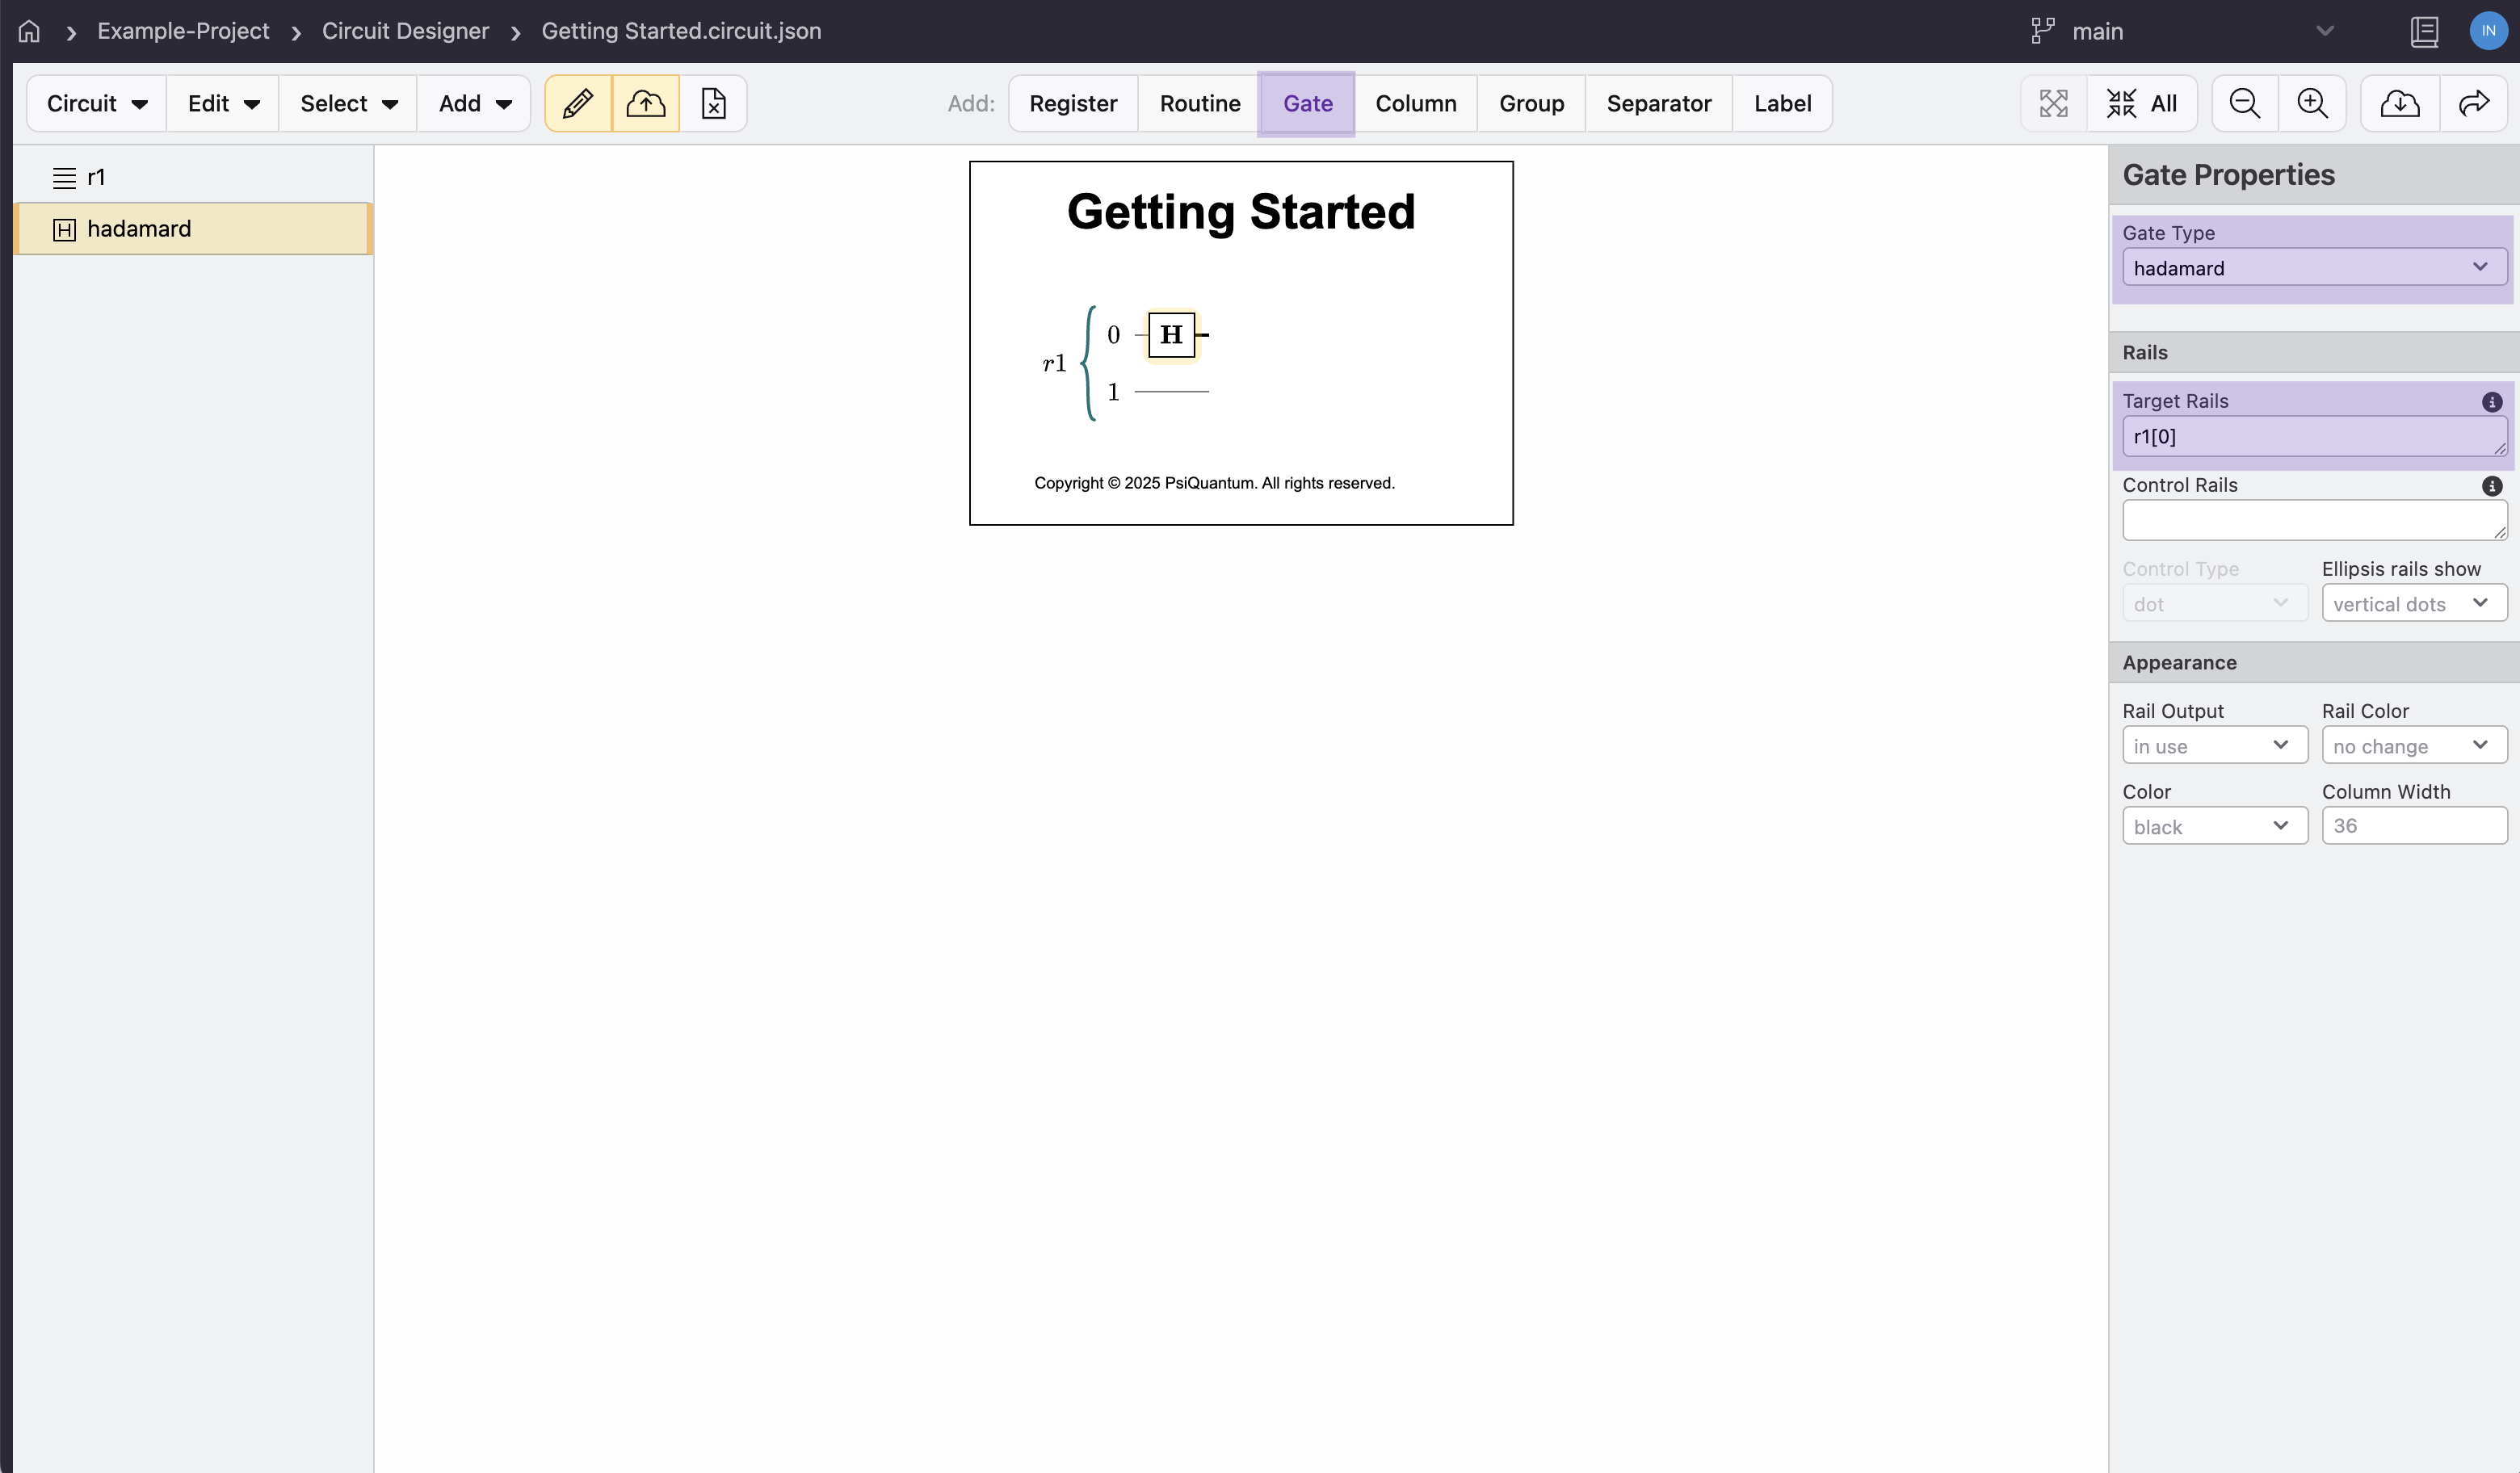
Tip
Make sure to specify r1[0] for the Hadamard gate to apply it only to the first qubit. Using r1 would apply it to all qubits.
Add a CNOT Gate
- Click Add Gate
- In the Gate panel:
- Set Gate Type to
cnot - Set Target Registers to
r1[0] - Set Control Registers to
r1[1] - Control Type should be
dot
- Set Gate Type to
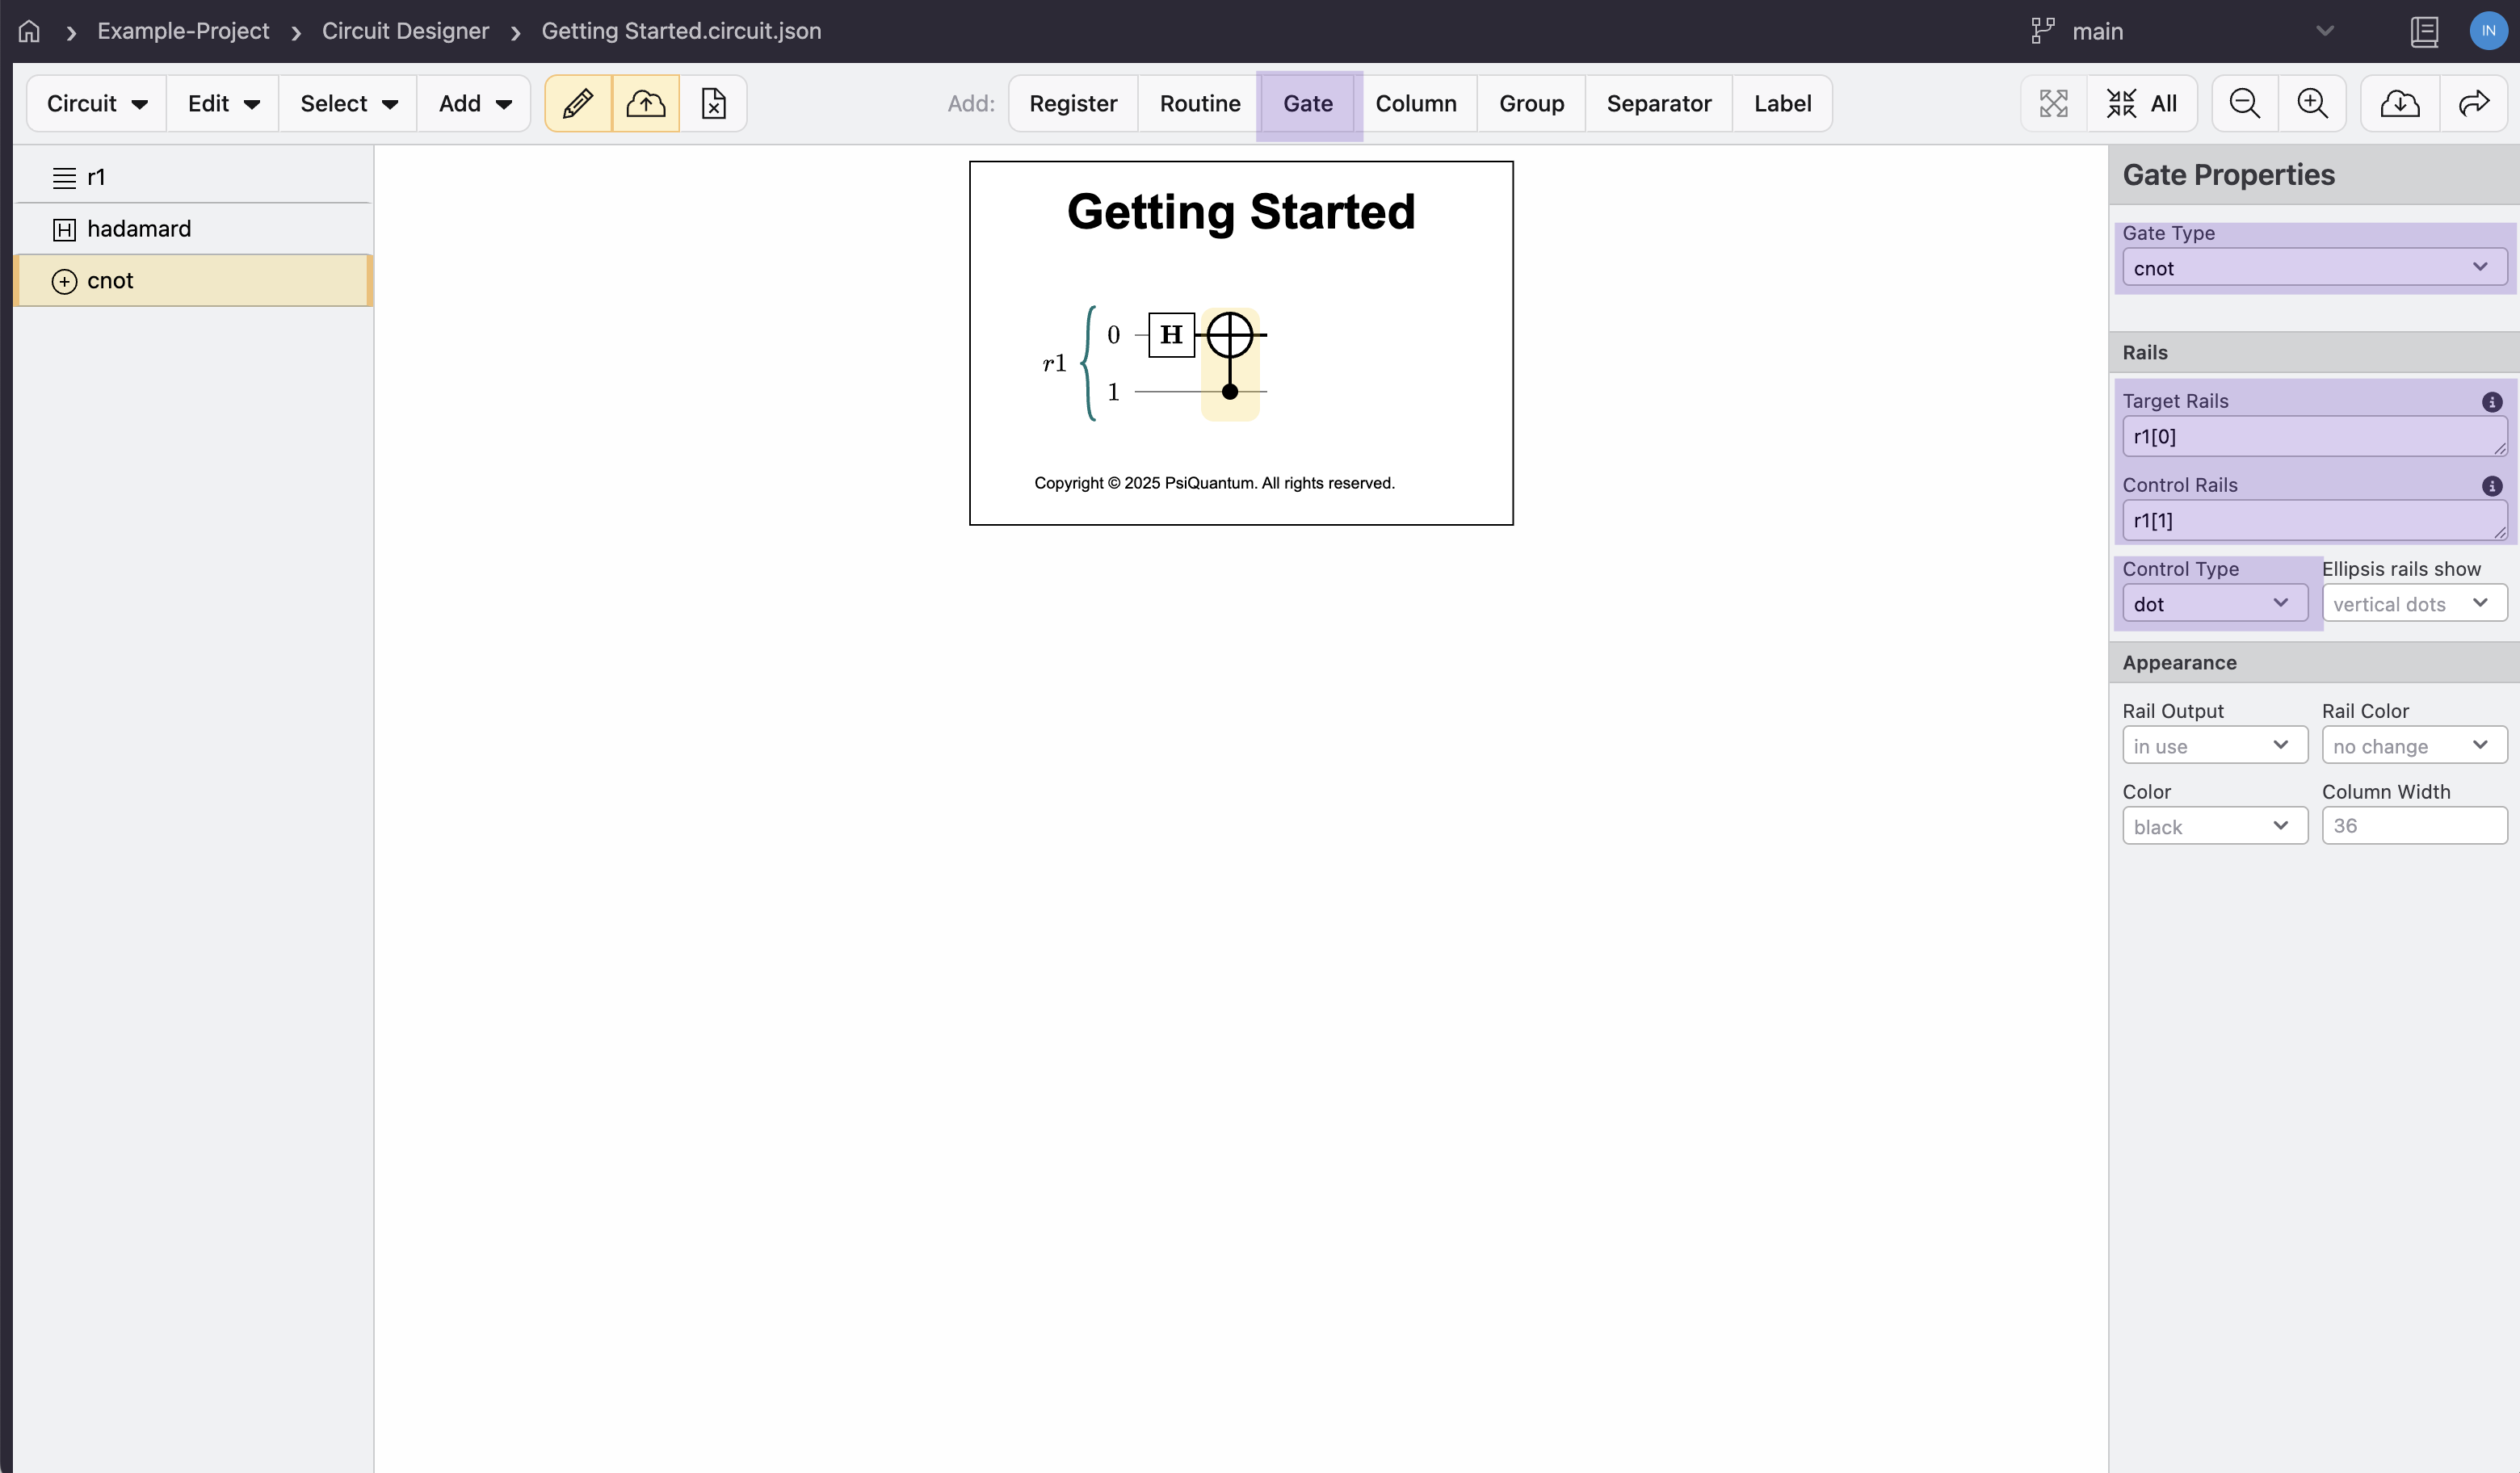
Tip
The CNOT gate requires both input and control registers. Make sure these are set correctly for the gate to work as intended.
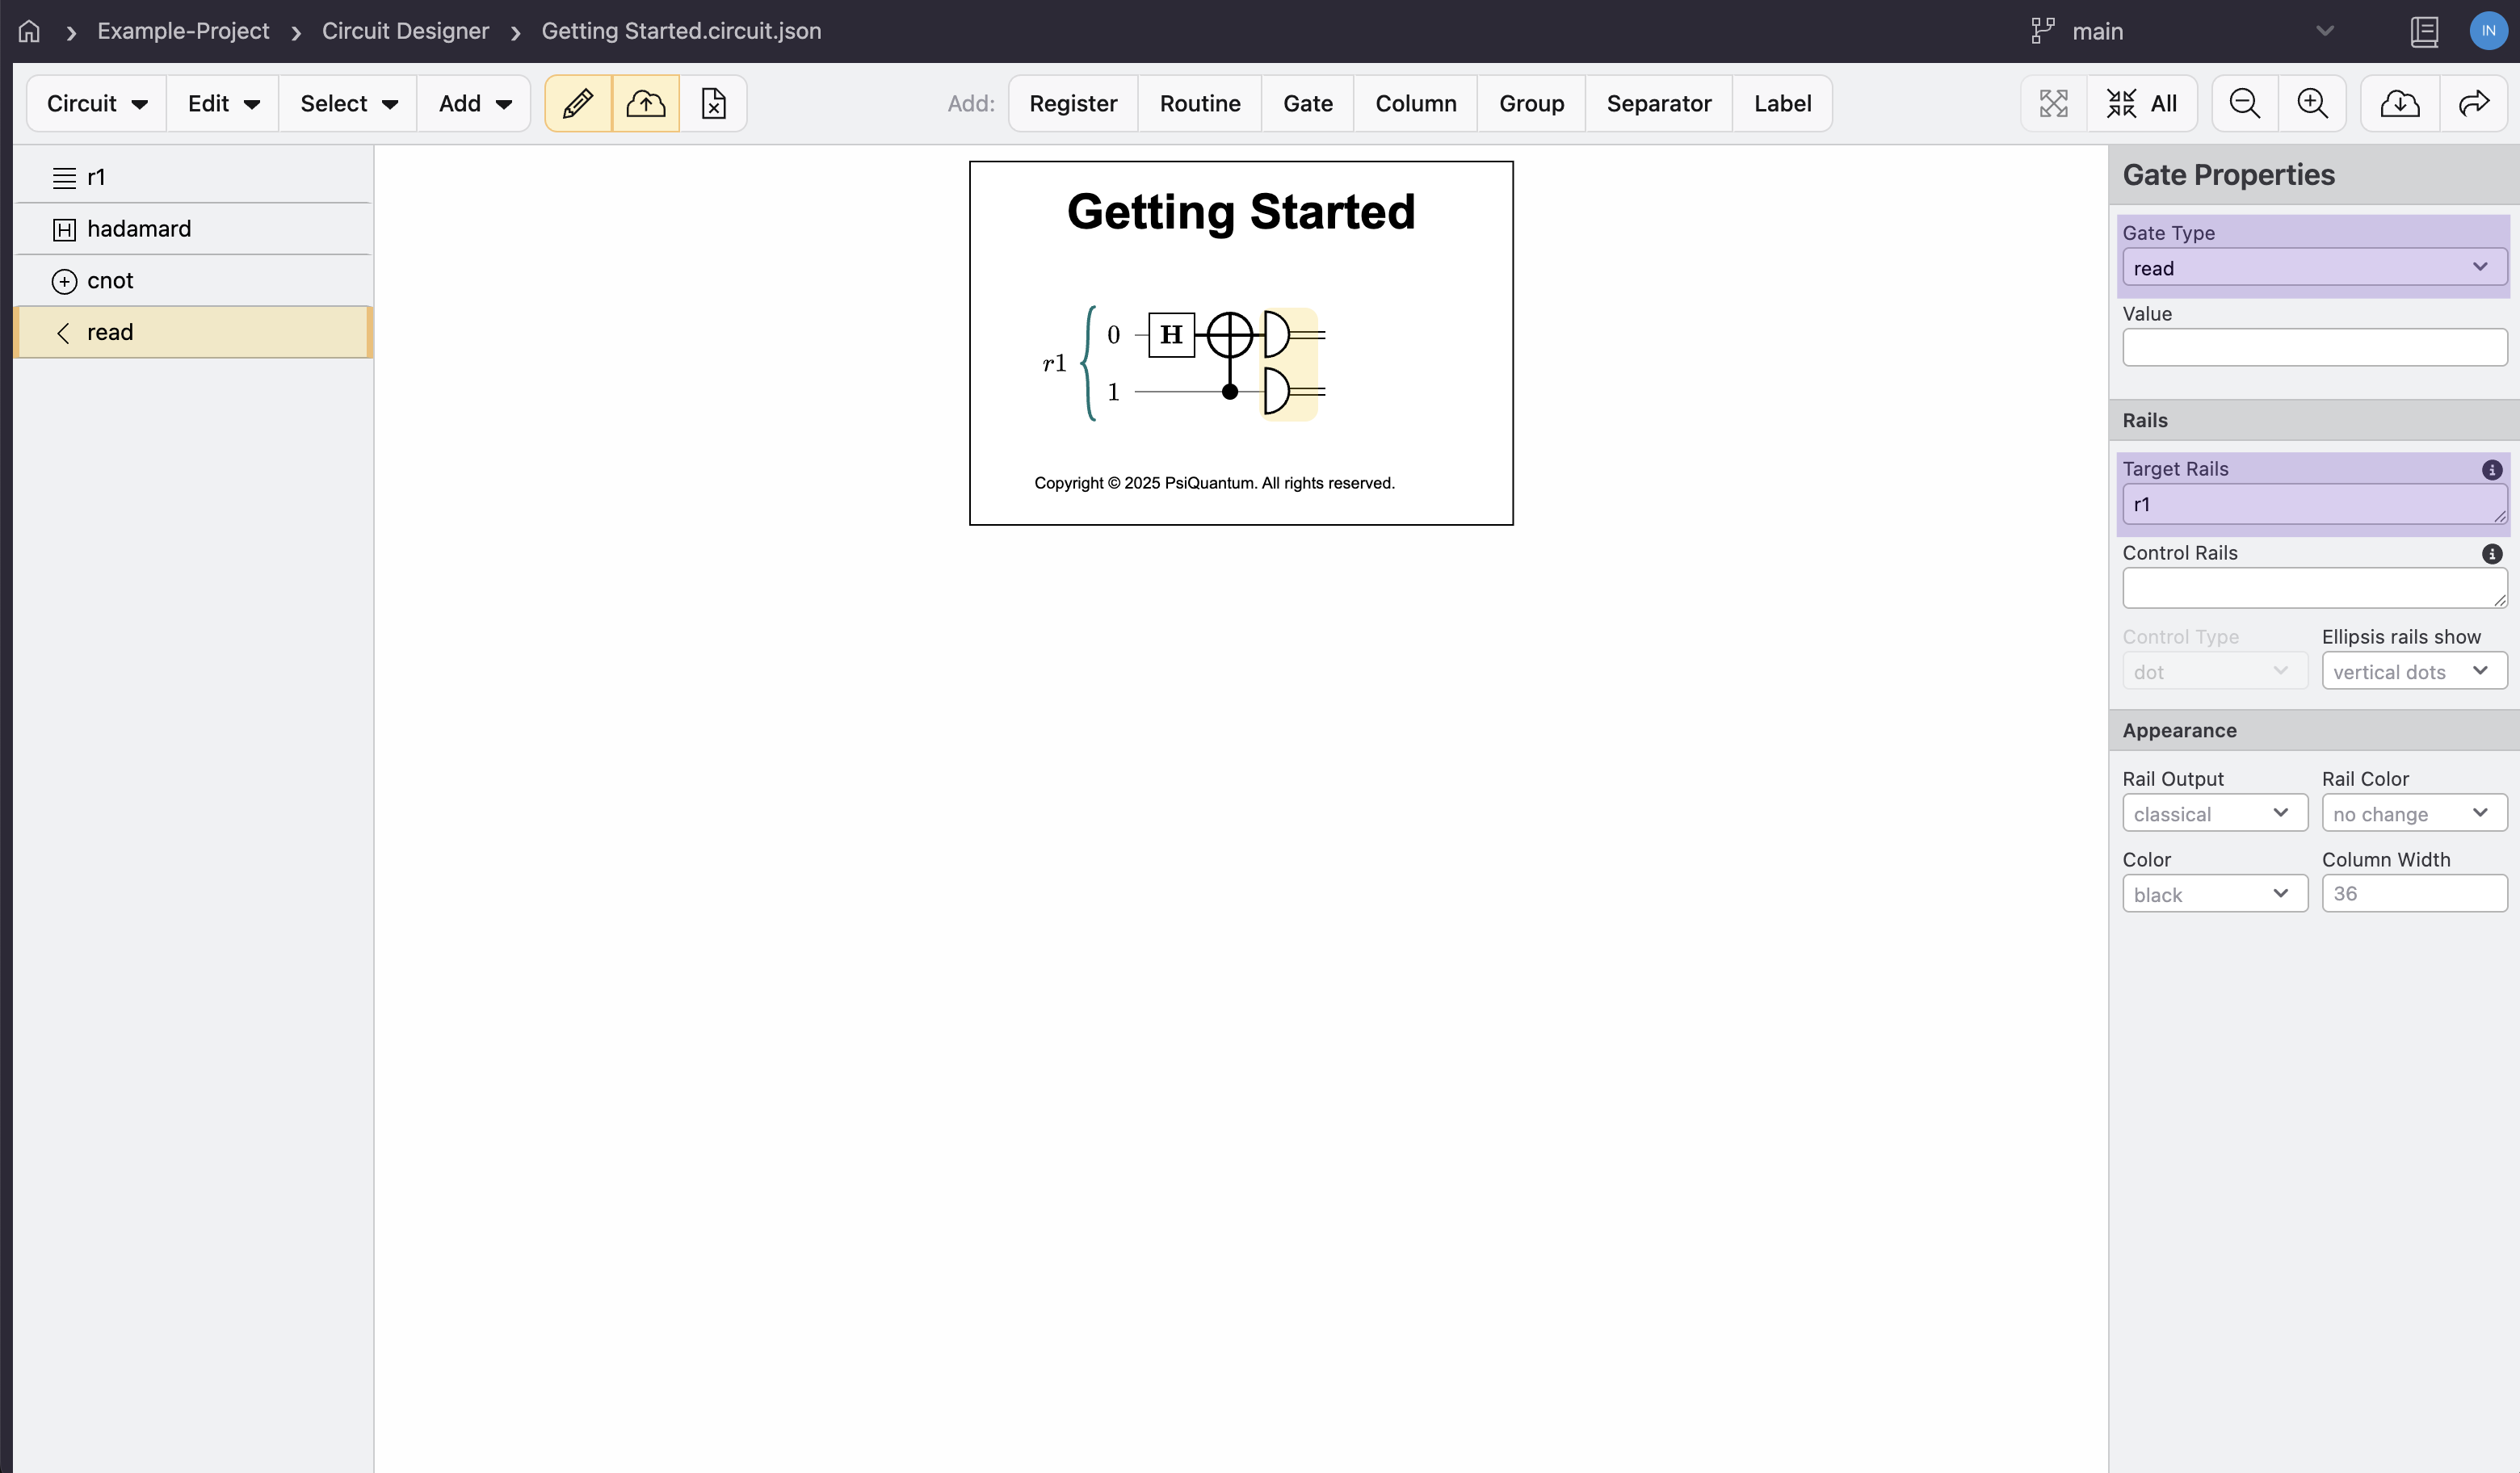
Add Read Operations
- Click Add Gate
- In the Gate panel:
- Set Gate Type to
read - Set Target Registers to
r1to assign the gate to both qubits
- Set Gate Type to
Save Your Circuit
Click the Save button in the toolbar to save your circuit.
Congratulations! You've created your first quantum circuit using Circuit Designer in Construct.
Next Steps
Now that you've created your first circuit, you can:
- Experiment with different gates
- Try modifying the circuit
- Learn about analyzing your circuit in the Circuit Designer documentation